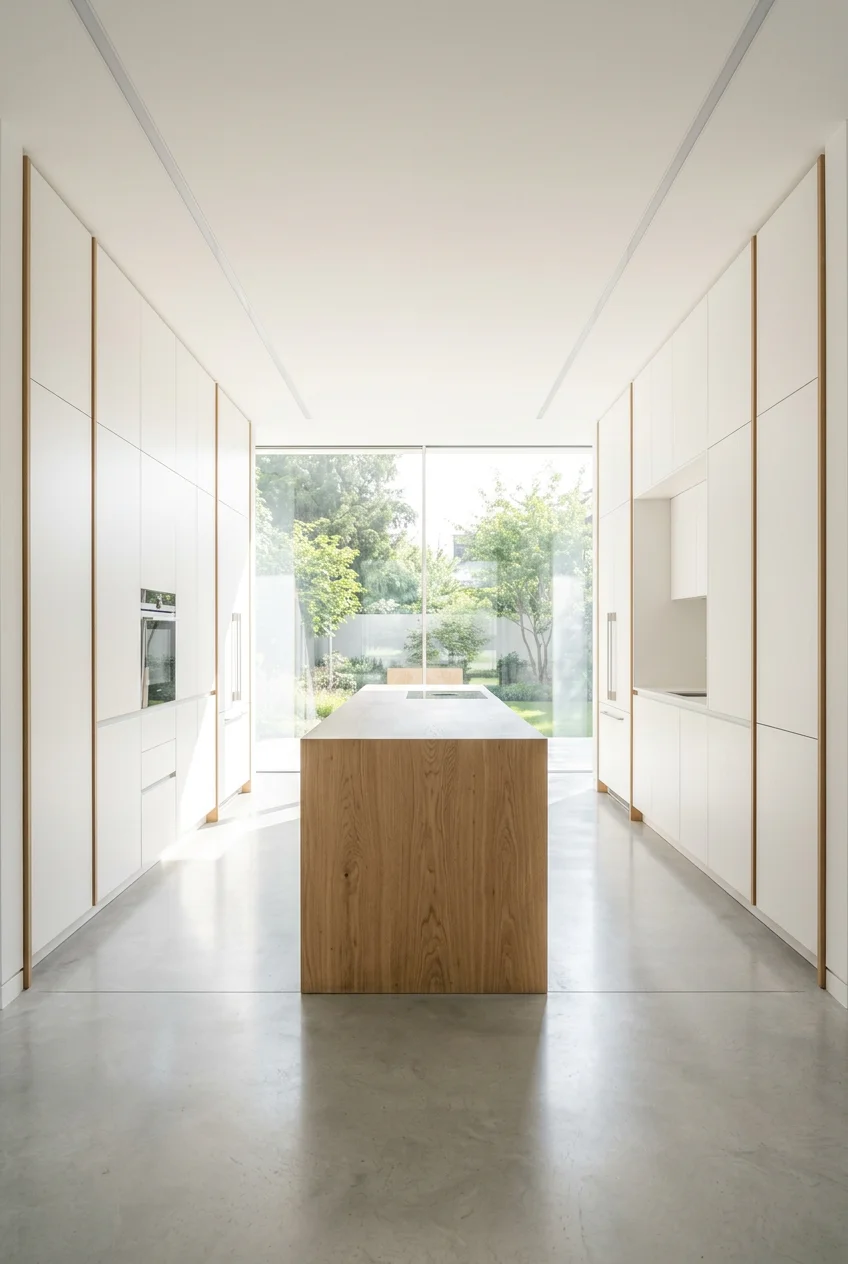
What’s Inside
- The Power of Half Decluttering Method
- Integrated Appliances for Visual Calm
- Multi-Functional Tools Over Gadgets
- Task-Based Zoning for Your Organization Minimalist Kitchen
- Pull-Out and Tiered Cabinet Systems
- Neutral Color Palette with Warm Accents
- Clear, Uniform Pantry Containers
- Appliance Garages and Deep Drawers
- Magnetic Storage and Rail Systems
- Handleless Cabinetry
- Clearing the Refrigerator Front
- Quality Over Quantity Cookware
- Drawer Inserts and Dividers
- The One In, One Out Rule
- Integrated Power Points in Storage
- Under-Sink Tension Rods
- Decanting Cleaning Supplies
- Hidden Trash and Recycling Bins
- The Daily Reset Routine for an Organization Minimalist Kitchen
Last Tuesday at Whole Foods, I caught myself staring blankly at a wall of spatulas while my phone buzzed with an urgent text from my husband about our overflowing utensil drawer. That jammed drawer was exactly why I finally had to master true organization minimalist kitchen setups. I tried the whole “just buy more plastic bins” approach for months before figuring it out. It turns out, stuffing cheap acrylic tubs into dark cabinets doesn’t fix a hoarding problem. You just end up with organized trash. Let’s walk through the actual steps that took my cooking space from a cluttered nightmare to a place where I can finally breathe while making my morning coffee.
1. The Power of Half Decluttering Method

To drastically reduce kitchen clutter, try the power of half method. I started this last January when I realized I owned fourteen coffee mugs for a two-person household. I placed exactly half of my kitchen items—half the mugs, half the plates, half the random wooden spoons—into a heavy-duty Home Depot moving box ($1.98 for a medium size). I folded the stiff cardboard flaps, taped it shut with loud packing tape, and shoved it in the dusty corner of the garage for three months. If you don’t need or miss an item during that time, donate the entire box without opening it. This expert-backed approach, championed by minimalists like Courtney Carver, helps you realistically assess what you actually use. I thought I’d miss my novelty mugs. I didn’t. The physical weight of the clutter was far worse than losing a mug with a funny cat on it. Trust me. Pro tip: do this with your baking supplies, too. You probably don’t need three different 9×13 glass pans taking up shelf space.
2. Integrated Appliances for Visual Calm

For a truly quiet aesthetic, opt for integrated appliances that disappear into your cabinetry. The loud visual noise of a giant stainless steel refrigerator ruins the calm vibe of a small room. I learned this the hard way after buying a massive, shiny LG fridge that constantly showed greasy fingerprints and reflected the harsh overhead lights. When we updated the cabinets, I bought custom wood panels from Bosch ($250 per panel) to cover the dishwasher and the new counter-depth fridge. This approach for 2026 helps maintain clean lines and a quiet visual layout. The wood grain provides a soft, matte texture that absorbs light rather than reflecting it. It makes the room feel calmer and more considered. A common mistake here is forgetting to measure the panel depth. Always ensure your hinges can handle the extra half-inch of heavy wood, or the door won’t open fully.
3. Multi-Functional Tools Over Gadgets

Avoid the common trap of accumulating single-use gadgets. As organizing expert Shira Gill notes, the most frequent source of kitchen clutter is definitely single-use tools. I agree. Last year, I bought a stupid avocado slicer at Target for $9.99 because the packaging looked convincing. It mashed the avocado into green paste and took up prime drawer space. Instead, invest in high-quality, multi-functional tools. A good 8-inch chef’s knife, like my Wüsthof Classic ($170), replaces numerous specialized slicers, choppers, and dicers. The heavy steel blade cuts through a butternut squash with a satisfying, clean thud against the wood board. You don’t need an apple corer, a garlic press, or a strawberry huller. You just need one sharp knife and basic knife skills. Skip the cheap plastic gadgets. They break after three trips through the hot dishwasher anyway and just create plastic waste.

Wagensteiger Stainless Steel Curved Garlic Presser or
Wagensteiger Stainless Steel Curved Garlic Presser or Cheese Grater has been one of the most consistently praised picks in this category. 13 reviewers averaged 4.5/5.
4. Task-Based Zoning for Your Organization Minimalist Kitchen

Organize your counters by task-based zones rather than just vague categories. I used to keep my coffee beans in the pantry, the grinder on the island, and the mugs near the sink. Making a single cup of coffee required walking across the room four times. Now, I use a strict task zone. I created a dedicated coffee station in the corner. I keep my Hario V60 ceramic dripper ($25), a stack of paper filters, and a bag of dark roast beans exactly twelve inches from the kettle. This approach ensures everything you need for a specific job is within arm’s reach, reducing wasted movement. Pro tip: create a prep zone with your cutting boards, knives, and olive oil right next to your primary chopping surface. Your organization minimalist kitchen fails if you’re constantly pacing back and forth across the room just to grab the salt shaker.
5. Pull-Out and Tiered Cabinet Systems

Maximize your lower cabinet space and accessibility with pull-out shelves and tiered racks. My biggest pet peeve is scraping my knuckles while reaching blindly into the dark abyss of a deep lower cabinet to find a specific saucepan. I finally installed Rev-A-Shelf solid wood pull-out drawers ($89.99 per unit at Home Depot) in all my bottom cabinets. The smooth glide of the metal tracks is satisfying, and I can finally see my heavy cast iron skillets without pulling out six other pots first. A common mistake is buying cheap plastic sliders that warp under the weight of metal pans. Spend the extra money on solid wood or heavy-gauge steel tracks. If you can’t see the back of the cabinet, you’ll just shove junk back there and forget it exists until you move out. You might also like: 15 Gorgeous Homemaking Simple Living Tips to Steal Right Now
6. Neutral Color Palette with Warm Accents

For a serene and expansive feel, stick to a curated neutral color palette. Trending shades for 2026 include soft taupe, creamy ivory, and flat grays. I painted my walls a flat creamy white, which instantly made the room feel twice as large. However, an all-white room can quickly look like a sterile hospital cafeteria. You have to incorporate natural materials to add warmth without introducing visual clutter. I keep a massive John Boos maple cutting board (the 20×15 inch size, $149) out on the counter at all times. The warm, oiled wood grain breaks up the stark white countertops perfectly. Skip the bright red silicone mats or neon dish towels. They pull your eye immediately and make the space feel chaotic. Stick to linen, wood, and matte ceramics to keep your nervous system calm while you cook. You might also like: 18 Travel Capsule Wardrobe Worth Trying

Kitchen Gadgets Set 5 Pieces
A dependable everyday pick — Kitchen Gadgets Set 5 Pieces pulls in 42 ratings at 4.5 stars. Not flashy, just solid.
7. Clear, Uniform Pantry Containers

Decant dry goods into clear, airtight containers to create a visually cohesive and manageable pantry. I used to keep half-open bags of flour and rice rolled up with rubber bands. It looked terrible, and I constantly spilled raw oats on the floor. Now, I use Ball Mason jars for everything. I buy the quart-sized jars for regular items and the half-gallon sizes for bulk goods. A dozen quart jars usually costs $14.99 at Kroger. Peeling off the loud, colorful cardboard packaging and pouring lentils into a heavy glass jar instantly reduces the visual noise of your shelves. This also allows for easy inventory management. You know exactly when you’re out of sugar. Pro tip: use a white sharpie paint pen to write the expiration date on the bottom of the glass jar. It washes off easily with hot water and dish soap when you refill it. You might also like: 17 Modern Minimalist Bedroom for Every Budget
8. Appliance Garages and Deep Drawers

Keep countertops entirely clear by storing small appliances in dedicated appliance garages or deep under-bench drawers. Leaving your toaster, blender, and stand mixer out on the counter is the fastest way to make a space look messy. I built a custom appliance garage into the corner of my cabinetry with a simple roll-down tambour door. It houses my Haden Heritage toaster ($89.99) and my electric kettle. I can pull them forward to use them, then push them back and shut the door. The visual relief of a completely empty quartz countertop is incredible. Ensure your deep drawers for heavier items like a KitchenAid mixer have a high weight capacity (at least 100 pounds). I broke a standard drawer track once by dropping a heavy mixer into it too quickly. Always check the hardware rating before storing heavy motors.
9. Magnetic Storage and Rail Systems

When drawer space is limited, utilize your vertical wall space. I hate bulky wooden knife blocks that sit on the counter. They collect dust in the slots and take up a massive footprint. Instead, I installed a 16-inch walnut magnetic knife strip ($45 from an Etsy maker) directly onto the tile backsplash. The strong magnetic pull grabs the heavy steel knives securely, keeping them off the counter but perfectly within reach. Alternatively, add a storage rail system to hang essential tools. The IKEA KUNGSFORS stainless steel rail ($14.99 for the 22-inch version) is cheap and looks sleek. I use the matching metal hooks to hang my measuring cups and a small wire basket for fresh garlic. A common mistake is hanging too much on these rails. Keep it strictly to items you use every single day, or it just becomes vertical clutter.

Kitchen Gadgets Set 5 Pieces
Honestly, Kitchen Gadgets Set 5 Pieces surprised me — sturdier than it looks in the photos, and over 49 buyers gave it 4.5 stars.
10. Handleless Cabinetry

A major trend for 2026 minimalist kitchens is handleless units, utilizing push-to-open mechanisms or integrated finger grooves. This design choice creates clean lines and a smooth flow across the room. I used to have bulky brushed brass knobs on all my lower drawers. I can’t tell you how many times I snagged the pocket of my favorite cardigan on those stupid knobs while rushing to check the oven. When we repainted the cabinets, I removed the hardware entirely, filled the holes with wood putty, and installed Blum push-to-open latches ($4.50 each). You just press your knee against the drawer face, and it pops open silently. It prevents clothes from snagging and enhances the sleek, uncluttered look. The only negative is that glossy paint finishes will show fingerprints with push-latches, so you absolutely must choose a matte or satin paint finish.
11. Clearing the Refrigerator Front

A surprising tip for reducing visual stimuli and promoting a calmer environment is to completely clear the front of your refrigerator. Studies have shown that homes with higher fridge density (more magnets, papers, and photos) also tend to have more overall house clutter. I used to use my fridge as a filing cabinet for wedding invitations, kids’ art, and takeout menus. It looked frantic. Last October, I pulled every single magnet off the stainless steel door. I bought a linen Kolo cloth binder ($45) to store the kids’ important artwork and recycled the rest of the paper clutter. The difference in the room’s energy was immediate. A blank, shiny refrigerator door acts like a mirror, bouncing light around the room and making the space feel larger. Stop using your appliances as bulletin boards.
12. Quality Over Quantity Cookware

Invest in a few high-quality, versatile pieces of cookware that can serve multiple purposes. You don’t need a 14-piece nonstick pot set. Most of those pots sit unused in the back of a cabinet while the cheap nonstick coating flakes off into your food. I donated my massive, mismatched collection and bought an 8-quart Dansk Kobenstyle casserole pot in matte white ($185). The heavy enamel over steel heats evenly, and I use it for soups, stews, boiling pasta, and even oven baking. The best part is the flat lid, which doubles as a trivet when you place it on the table. This drastically reduces the need for numerous specialized pots. Pro tip: keep one large Dutch oven, one 10-inch cast iron skillet, and one small stainless steel saucepan. That trio handles 95 percent of all home cooking tasks.

Joseph Joseph Nest Utensils Compact Stacking Kitchen Tool
Joseph Joseph Nest Utensils Compact Stacking Kitchen Tool Set with Mag punches above its price — 37 buyers rated it 4.5 stars. I would buy it again.
13. Drawer Inserts and Dividers

Prevent chaotic drawers by using specific, rigid inserts and dividers. Throwing spatulas and whisks loosely into a drawer guarantees they will tangle together, preventing the drawer from opening. I struggled with this until I bought LEICHT COMBO adjustable dividers ($45 for a set of four). They snap firmly into place and don’t slide around when you open the drawer. I tried those cheap bamboo spring-loaded dividers from Amazon first, but they warped in the humidity and eventually snapped. Learned that the hard way. For spices, tiered drawer inserts allow you to lay jars flat so you can see every label at once, avoiding the annoying process of rummaging through a dark upper cabinet. Keep your dividers the exact same color as the inside of your drawer box. It creates a quiet, cohesive look when you pull the drawer open.
14. The One In, One Out Rule

To prevent new items from quietly re-cluttering your space, adopt a strict one in, one out rule. This continuous curation is essential for maintaining a calm space. Last week, I bought a beautiful cherry red Le Creuset silicone spatula ($12) because the wooden handle felt great in my hand. As soon as I brought it home, I immediately pulled an old, melted plastic spatula out of my utensil crock and threw it in the trash. When you purchase a new item, you must commit to donating or discarding an existing item that serves a similar purpose. If you don’t do this, your drawers will slowly fill back up over the course of a year. I keep a dedicated Goodwill donation bag in the hall closet. Whenever I upgrade a tool or buy a new coffee mug, an old one goes straight into that bag.
15. Integrated Power Points in Storage

For appliances stored in cabinets or appliance garages, a highly practical tip is to have power points installed directly inside the cabinetry. I used to pull my heavy blender out of the cabinet, drag the cord across the counter, plug it into the wall, use it, unplug it, wrap the cord, and put it away. It was exhausting. I hired an electrician to install a Legrand pop-out outlet ($49.98) inside the back wall of my pantry cabinet. Now, I leave frequently used appliances like my coffee grinder plugged in and ready for use on the pantry shelf. It eliminates the hassle of pulling them out and dealing with tangled black cords on your clean white countertops. Always ensure your electrician uses GFCI outlets if they are installed anywhere near your sink or water lines.

Public Goods Kitchen Tool Set | 6 Piece Kitchen Utensil Set
A dependable everyday pick — Public Goods Kitchen Tool Set | 6 Piece Kitchen Utensil Set | Includes pulls in 35 ratings at 4.5 stars. Not flashy, just solid.
16. Under-Sink Tension Rods

Under-sink cabinets are usually a dark, damp disaster zone of crumpled plastic bags and leaking soap bottles. I fixed this by installing a simple heavy-duty tension rod across the top width of the cabinet interior. I used a basic Target Room Essentials tension rod ($5.00), placed about three inches from the top of the cabinet opening. I hang all my spray cleaners by their trigger handles directly onto the rod. This utilizes the dead vertical space at the top of the cabinet and leaves the entire bottom floor clear for dishwasher pods and sponges. I buy my Seventh Generation dish soap ($3.49) at Sprouts and keep it in a small wire basket below the hanging sprays. A common mistake is buying a flimsy curtain rod. You need a heavy-duty shower tension rod, or the weight of full liquid bottles will pull it down.
17. Decanting Cleaning Supplies

Just like the pantry, the visual noise of brightly colored cleaning supplies creates subconscious stress. Staring at neon green and bright orange plastic bottles under the sink ruins the minimalist aesthetic. I buy basic white vinegar in massive bulk jugs from Costco ($4.99 for two gallons) and decant it into clear Grove Collaborative glass spray bottles ($14.99 each) fitted with silicone bottom sleeves to prevent clinking. I mix the vinegar with water and a few drops of lemon essential oil. The uniform glass bottles look incredibly neat lined up under the sink. Skip the heavily fragranced, brightly dyed commercial cleaners. They smell like artificial pine needles and look terrible. Sticking to clear glass and simple, natural cleaning liquids keeps the hidden spaces of your room just as curated and calm as the countertops.
18. Hidden Trash and Recycling Bins

Nothing ruins a beautifully designed space faster than a plastic freestanding trash can sitting at the end of the island. It smells, it attracts fruit flies, and it looks awful. I finally installed a Simplehuman 35-liter dual pull-out bin system ($79.99) inside a lower cabinet near the sink. The heavy steel frame glides out smoothly, holding one bin for trash and one for recycling. Hiding the garbage behind a cabinet door instantly cleans up the floor plan and removes visual clutter. I tried a cheaper plastic track system first, but it bent under the weight of heavy glass recycling. Spend the money on a steel track. Pro tip: keep a small box of baking soda in the very back of the pull-out track to absorb any lingering odors before they seep into the surrounding wood cabinetry.
19. The Daily Reset Routine for an Organization Minimalist Kitchen

You can buy all the expensive drawer dividers in the world, but your organization minimalist kitchen will fail without a daily reset routine. Clutter is a daily behavioral issue, not a one-time structural problem. Every single night after dinner, I spend exactly ten minutes resetting the space to zero. I load the dishwasher, wipe down the quartz countertops with Method All-Purpose Cleaner ($4.49 at Walmart), and put every stray mail envelope or coffee cup away. I leave the sink completely empty and dry. Waking up to a spotless, quiet room sets the tone for my entire morning. If I skip this routine, the clutter compounds exponentially the next day. A minimalist space requires daily maintenance. It isn’t a museum; it’s a workspace. But putting the tools away when the work is done is the only way to keep the peace. No exaggeration.
I’d highly recommend starting with the power of half method this weekend. It costs nothing and gives you immediate visual relief. If you found these tips helpful, definitely pin this article to your kitchen boards so you can reference the specific product dimensions later!
Frequently Asked Questions
How do I start an organization minimalist kitchen?
Start with the power of half method. Box up half your mugs, utensils, and plates for three months. If you don’t miss them, donate the box. This immediately clears physical space and reduces visual noise on your counters.
What is the best way to store small appliances?
Use an appliance garage or deep lower drawers with a high weight capacity. Keeping toasters and blenders off the counter is essential for maintaining the clean, unbroken lines of a minimalist design.
How do I organize deep lower cabinets?
Install heavy-duty wood or steel pull-out drawers. These allow you to reach heavy pots and pans at the back of the cabinet without scraping your knuckles or losing items in the dark.
Should I decant my pantry items?
Yes. Decanting dry goods into uniform glass jars like Mason jars removes the loud, chaotic branding of cardboard packaging. It creates a calm aesthetic and makes inventory management much easier.
