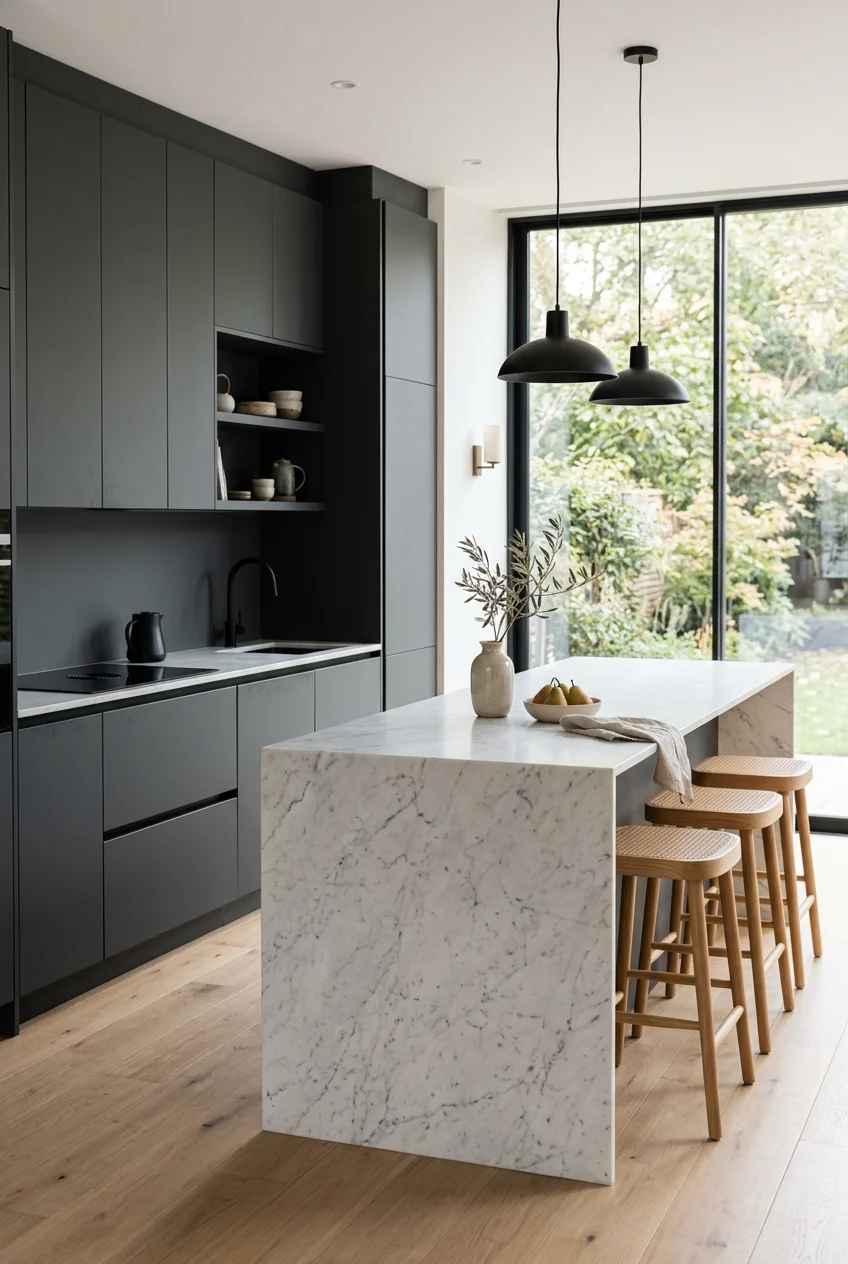
What’s Inside
- How to Design Small Modern Minimalist Kitchen Spaces with Warm Tones
- Hide Your Gear with Integrated and Compact Appliances
- Maximize Vertical Storage with Ceiling-Height Cabinetry
- Implement Smart Hidden Storage Solutions in Narrow Gaps
- Choose Handleless Cabinetry for a Streamlined Look
- Prioritize the Work Triangle to Avoid Cooking Disasters
- Opt for a Single Stone Slab for Countertop and Backsplash
- Buy Multi-Functional Small Appliances to Clear Counters
- Integrate Smart Technology That Actually Saves Space
- Choose a Bar-Height Peninsula to Hide Your Mess
- Select Durable Matte Finishes to Prevent Smudges
- Use Layered Lighting to Make the Room Feel Larger
- Add Depth with Plaster and Textured Wall Treatments
- Adopt a Buy Once, Buy Well Mentality for Accessories
- How to Design Small Modern Minimalist Kitchen Layouts Without Bulky Islands
Last November, I stood in my cramped apartment holding three brown paper bags from Whole Foods, staring at a counter buried under a bulky toaster and a plastic drying rack. I had zero inches of prep space to put down my 16 oz carton of eggs. If you’re designing small, modern, minimalist kitchen spaces, you’ve got to start by admitting when your setup is failing. I tried the generic organization hacks for months before figuring it out. Spoiler alert: buying more plastic bins doesn’t fix a broken layout. I learned that the hard way. You’ve got to strip the room to its bones. Today, I’m sharing the exact measurements, specific finishes, and hard lessons I picked up while rebuilding my cooking space. I’ll show you why a $1,000 dishwasher makes sense and why you should skip the bulky island entirely. Let’s look at fifteen specific ways to fix your tiny cooking area this weekend.
1. How to Design Small Modern Minimalist Kitchen Spaces with Warm Tones

Most people get this wrong right out of the gate. They paint everything stark hospital white, thinking it makes the room look bigger. I tried this; it just felt like a sterile lab. My kitchen felt cold and echoed every time I set down a ceramic coffee mug. Move beyond stark whites and grays by incorporating warm neutral color palettes. I painted my cabinets with Behr Cabinet and Trim Enamel in the shade Blank Canvas ($34.98 for a 1-gallon can at Home Depot). The creamy ivory tone softened the harsh morning light. Pair this paint with natural materials. I installed 1.5-inch thick white oak floating shelves above the sink. The subtle wood grain breaks up the flat walls without adding visual clutter. If you’re picking a stone countertop, look for quartzite or soapstone with muted brown or sage green veining. The texture of natural stone absorbs light differently than cheap laminate. It creates a cozy yet uncluttered feel. Skip the high-gloss finishes. They show every fingerprint and reflect glare straight into your eyes.
2. Hide Your Gear with Integrated and Compact Appliances

Ignoring integrated appliances disrupts your design flow and makes a small room feel cramped. I used to have a massive stainless steel refrigerator that stuck out six inches past the cabinets. I hit my shoulder on it every morning. Opt for panel-ready or integrated appliances that blend with your cabinetry. This maintains clean lines and reduces visual noise. For dishwashers, I highly recommend the Fisher & Paykel DishDrawer. It costs $1,149.00 and slides into a standard 24-inch lower cabinet space. It runs quietly at 45 dBA, which matters when your living room sofa is five feet away. For refrigeration, you don’t need a massive unit if you shop frequently. A compact, counter-depth model like the GE 3.1 Cu. Ft. Mini Fridge ($458.00) fits snugly under the counter. If you need a full-height option, buy a narrow 24-inch wide model. I bought a slim fridge last Tuesday at Target, and the 24-inch width finally allowed me to open the door fully without hitting the oven handle. I’d rather hand-wash a pot than lose 24 inches of lower cabinet space to a bulky machine.
3. Maximize Vertical Storage with Ceiling-Height Cabinetry

Leaving a 12-inch gap between your cabinets and the ceiling is a waste of real estate. I lived with that dusty gap for two years. It just became a graveyard for empty cardboard boxes and a greasy film that took hours to scrub off with a sponge. Extend your cabinetry to the ceiling. This maximizes storage potential and creates a strong vertical line, making the ceiling appear higher. I keep my heavy 6-quart cast iron Dutch oven and my bulk 32 oz mason jars of flour on the highest shelf. Since I only bake once a month, I don’t need daily access to them. You’ll need a way to reach these items safely. I bought a foldable steel step stool from Target for $19.99. It collapses down to a 2-inch thickness, so I slide it right next to the fridge. Pro tip: skipping vertical storage opportunities is a common oversight that leads directly to crowded countertops. Use every vertical inch you have.

Wagensteiger Stainless Steel Curved Garlic Presser or
If you want something that just works, Wagensteiger Stainless Steel Curved Garlic Presser or Cheese Grater is a safe bet (13 reviews, 4.5 stars).
4. Implement Smart Hidden Storage Solutions in Narrow Gaps

You probably have dead space in your layout right now. I had a useless 4-inch gap between my oven and the wall. I used to drop wooden spoons down there and curse trying to fish them out with a bent wire hanger. Integrate pull-out pantries in these narrow gaps. I installed a Rev-A-Shelf 3-inch pull-out filler organizer I found at Home Depot for $189.99. It holds twenty-four 2 oz glass spice jars perfectly. You can also install toe-kick drawers at the very bottom of your cabinets near the floor. These flat 3-inch tall drawers are perfect for storing 18-inch aluminum baking sheets. IKEA offers great internal organizers like the MAXIMERA drawer dividers ($14.99 per set) that keep these hidden spaces tidy. Here is a surprising trick: you can build a fake kitchen backsplash that slides open on a track. I used a 24-inch wide piece of matching quartz that slides horizontally to conceal my messy coffee station. It keeps the main countertops clear of daily clutter.
5. Choose Handleless Cabinetry for a Streamlined Look

Standard cabinet knobs are the enemy of a narrow walkway. Last winter, I ripped a hole in my favorite heavy wool sweater because it caught on a cheap brass drawer pull while I was rushing to flip pancakes. Select handleless cabinets with integrated grooves or push-to-open mechanisms. I removed all my old hardware and installed magnetic push-to-open latches from Amazon. They cost $4.50 each and take ten minutes to screw into the frame. You literally press your knee against the trash pull-out, and it pops open. This design choice saves you about two inches of clearance in tight walkways. It also prevents snagging clothes and wiping down greasy metal knobs every weekend. The flat, uninterrupted cabinet faces contribute to the sleek aesthetic you need for a minimalist room. If you hate push-latches, ask your cabinet maker for recessed finger pulls routed directly into the top edge of the 3/4-inch thick cabinet doors. It’s more expensive upfront but looks incredibly clean. You might also like: 15 Capsule Wardrobe Men That Actually Work
6. Prioritize the Work Triangle to Avoid Cooking Disasters

Overlooking the work triangle makes cooking deeply inconvenient. I once rented an apartment where the sink was a full eight feet away from the stove. I dropped a 16 oz jar of marinara sauce onto the white oak floorboards while trying to carry it across the room. Ensure that your refrigerator, sink, and stove are arranged in a tight, efficient triangle. In a small space, an L-shaped or galley layout works best. You want no more than 48 inches of walking distance between your prep zone and your cooking zone. I remodeled my current layout to form a tight galley. I can stand at the sink, pivot 180 degrees, and set a heavy pot of water onto the induction burner. You shouldn’t have to take more than two steps to reach your cutting board from the fridge. Map out your movements with blue painter’s tape on the floor before you commit. If the triangle feels too wide, fix it immediately. You might also like: 19 Work Capsule Wardrobe You Need to See

Joseph Joseph Nest Utensils Compact Stacking Kitchen Tool
Honestly, Joseph Joseph Nest Utensils Compact Stacking Kitchen Tool Set with Mag surprised me — sturdier than it looks in the photos, and over 37 buyers gave it 4.5 stars.
7. Opt for a Single Stone Slab for Countertop and Backsplash

Subway tile is fine, but grout lines create visual clutter. I spent three years scrubbing tomato stains out of white grout with a toothbrush, and I refuse to do it ever again. Use the same material for both your countertop and your backsplash. I chose a continuous slab of Mont Blanc quartzite. It cost $115.00 per square foot at my local stone yard. Running the 1.25-inch thick stone horizontally on the counter and vertically up the wall creates a continuous, architectural look. This visually expands the space because your eye doesn’t catch on a harsh transition line between two materials. It reduces visual breaks, contributing to a calmer room. Last week, I spilled a 5 oz glass of red wine from Trader Joe’s against the back wall. Instead of panicking about grout stains, I wiped the solid quartzite clean with a damp rag in two seconds. It’s expensive upfront, but the daily ease of maintenance makes it worth the investment. You might also like: 20 Lovely Minimalist Simple Living Home Tips for Every Budget
8. Buy Multi-Functional Small Appliances to Clear Counters

Overcrowding countertops with single-use gadgets is a rookie mistake. I used to own a rice cooker, a slow cooker, a toaster, and an air fryer. They swallowed my entire 60-inch counter. I donated all of them and invested in multi-functional small appliances. I bought the Ninja Foodi Smart XL Air Fry Oven at Walmart for $199.99. It sits in a 17-inch wide corner and can roast a whole 4 lb chicken, bake a 12-inch pizza, and dehydrate apple slices. I also swapped my bulky blender for a compact Cuisinart 4-Cup Food Processor ($39.95). It handles chopping onions, blending small batches of soup, and grating a 4 oz block of parmesan cheese. When you have limited square footage, every item on your counter needs to earn its keep by performing at least three different jobs. If a tool only does one specific thing, like an avocado slicer, throw it in the donation bin immediately. You won’t miss it.
9. Integrate Smart Technology That Actually Saves Space

A lot of smart home tech is just a gimmick that requires annoying updates. I bought a smart coffee maker once, and the app crashed so often I couldn’t brew my morning cup. But for 2026, thoughtful smart kitchen technology can genuinely save you space. Look for appliances with a sleek profile. I switched to the Bosch Benchmark Series 30-inch smart induction cooktop. It costs $1,599.00 at Lowe’s. Because it uses induction, the flat black glass surface cools down in minutes. When I’m not cooking, I lay a large 24-inch wooden cutting board over the burners to create an extra prep zone. You can’t do that with raised gas grates. The cooktop connects to an app, letting me check if I left a burner on while I’m at the grocery store. It also lacks bulky front knobs, utilizing a digital touch interface instead. This shaves off two inches of depth, keeping the front profile flush with the surrounding 1.5-inch thick quartz counters.

Kitchen Utensils Set – 34 PCS Non-Stick Silicone Cooking
Honestly, Kitchen Utensils Set – 34 PCS Non-Stick Silicone Cooking Utensils Set surprised me — sturdier than it looks in the photos, and over 202 buyers gave it 4.5 stars.
10. Choose a Bar-Height Peninsula to Hide Your Mess

If your kitchen opens into your living room, you need a visual barrier. I used to have a flat island. Whenever I hosted friends, they had a front-row seat to my dirty mixing bowls and greasy spatulas. I hated feeling exposed while I cooked. Incorporate a bar-height peninsula instead. A standard counter is 36 inches tall, but a bar-height counter sits at 42 inches. That extra six inches of height discreetly hides a sink full of dirty dishes from anyone sitting on the sofa. I built a small peninsula with a 10-inch overhang. I bought two backless wooden bar stools from Costco for $89.99 each. They slide underneath the overhang when not in use, keeping the walkway clear. You must ensure adequate walking space around the peninsula. I measured exactly 50 cm of clearance on the tightest side. It’s snug, but it works perfectly for a single person.
11. Select Durable Matte Finishes to Prevent Smudges

Glossy cabinets belong in the early 2000s. I rented a condo with high-gloss acrylic cabinets, and I spent twenty minutes every night wiping off dog nose prints and greasy fingerprints. Opt for matte, fingerprint-resistant finishes on your cabinetry and hardware. I repainted my current lower cabinets using Sherwin Williams Urethane Trim Enamel in a flat matte finish ($109.99 per gallon). I also installed matte black faucet hardware. Yesterday at Sprouts, I grabbed bulk almonds and got oil on my fingers. I turned on the matte black faucet, and it didn’t leave a single shiny smudge. These flat surfaces reduce harsh glare from overhead lights. They make warm color palettes feel richer and softer. A matte finish keeps the room looking composed during heavy daily use. Just make sure you buy a high-quality, washable matte paint. Cheap flat paint will scuff if you bump it with a heavy 12 oz ceramic coffee mug.
12. Use Layered Lighting to Make the Room Feel Larger

Poorly considered lighting makes a small room feel like a gloomy cave. I relied on a single flush-mount ceiling dome for a year, and I constantly chopped vegetables in my own shadow. Combine ambient, task, and accent lighting to create depth. I installed the Philips Hue Lightstrip Plus ($89.99) directly under my upper cabinets. The 80-inch LED strip provides perfect, bright task lighting exactly where I hold my heavy 8-inch Wüsthof chef’s knife. For ambient light, I added four 4-inch recessed LED ceiling lights spaced 36 inches apart. Finally, I hung a small, minimalist matte black pendant light from Target ($45.00) over the sink. It adds a touch of personality without overwhelming the sightline. You can control the Philips strip with your phone, dimming it to 10% brightness at night. It acts as a perfect nightlight when I sneak in to grab an 8 oz glass of water at 2 AM. Good lighting visually pushes the walls outward.

Public Goods Kitchen Tool Set | 6 Piece Kitchen Utensil Set
Public Goods Kitchen Tool Set | 6 Piece Kitchen Utensil Set | Includes punches above its price — 35 buyers rated it 4.5 stars. I would buy it again.
13. Add Depth with Plaster and Textured Wall Treatments

Blank drywall is boring, but hanging a bunch of framed art in a tiny cooking zone just creates clutter. The glass frames get coated in cooking grease. Instead of flat painted walls, consider textured wall treatments. I applied a micro-cement finish to the wall behind my open shelving. I bought a 50 lb bag of SureCrete micro-cement for $45.00 at a local masonry supply store. I troweled it on 1/8 inch thick. The subtle, mottled gray texture adds incredible depth to the room without introducing a physical object. It aligns perfectly with the 2026 trend of tactile walls. You can also use 3D wood slatting on the back of a peninsula. I cut 1-inch wide white oak strips and glued them vertically. It gives the room an architectural, custom feel. Just seal the plaster or wood with a clear, water-based polyurethane so you can easily wipe off splashes from a rogue 14 oz can of diced tomatoes.
14. Adopt a Buy Once, Buy Well Mentality for Accessories

When you have limited counter space, the items you leave out become part of the decor. Stop buying cheap plastic appliances that break after six months. I went through three $20 plastic kettles before I realized they looked terrible and leaked constantly. Adopt a buy once, buy well mentality. Favor artisanal or high-quality items made from metal, glass, or solid wood. I finally bought the BALMUDA The Kettle. It costs $179.00 at Williams Sonoma. It has a tiny 6-inch footprint and a 20 oz capacity. The matte black stainless steel body and precise gooseneck pour make it a joy to use. I leave it out 24/7 because it looks like a piece of modern sculpture. I apply the same rule to my cutting board. I bought a heavy, 2-inch thick end-grain walnut board from a local woodworker for $130.00. It stays on the counter permanently. This approach reduces landfill waste and ensures you only interact with beautiful, functional tools.
15. How to Design Small Modern Minimalist Kitchen Layouts Without Bulky Islands

Trying to cram a massive island into a tiny footprint is a terrible idea. Massive islands aren’t realistic for tiny homes. I see people do this constantly on social media, and it ruins the flow of the house. I made this mistake in my first house. I bought a bulky 48-inch wide freestanding island. I spent a year bruised at the hips from squeezing past it while carrying heavy plastic grocery bags from Kroger. If you want a fixed island, you need at least 12 feet of total room width to accommodate it comfortably. You must maintain clear walkways of at least 36 inches on every side. If you don’t have that space, skip the fixed island entirely. Opt for a rolling steel prep cart instead. I bought a 24-inch wide stainless steel cart on locking casters for $115.00. I roll it into the center of the room when I need to roll out 12 inches of pie dough, and I tuck it into a corner when I’m done.
Minimalism isn’t about suffering with nothing; it’s about making sure every inch of your room serves a distinct purpose. I’ve spent years fighting against terrible layouts and cheap, bulky appliances before I finally learned to measure properly and invest in the right materials. Stop buying plastic organizers and start rethinking your actual floor plan. If you’re ready to tackle your own renovation, save this guide to your Pinterest boards. Pin it, review the measurements before you hit the hardware store, and don’t let anyone talk you into a massive island you don’t have room for. You’ve got this.

Mfacoy Spoon Rest for Stove Top
Honestly, Mfacoy Spoon Rest for Stove Top surprised me — sturdier than it looks in the photos, and over 796 buyers gave it 4.5 stars.
Frequently Asked Questions
What colors work best when you design small modern minimalist kitchen spaces?
Warm neutral palettes like creamy ivory, soft taupe, and sage green work best. These earth tones prevent the room from feeling cold and sterile, while maintaining the uncluttered aesthetic essential for minimalist design.
How do I maximize storage in a tiny kitchen?
Extend your cabinetry all the way to the ceiling to utilize vertical space. You can also install pull-out organizers in narrow 4-inch gaps and add toe-kick drawers at the base of your cabinets for flat items like baking sheets.
Are kitchen islands a good idea for small layouts?
Usually, they aren’t. You need at least 36 inches of clear walkway on all sides. If your room is narrower than 12 feet, skip the fixed island and use a rolling prep cart instead.
What kind of hardware is best for minimalist cabinets?
Handleless designs are ideal. Use magnetic push-to-open latches or recessed finger pulls routed into the cabinet doors. This saves walkway space, prevents snagging clothes, and keeps the visual lines of the room completely flat.
