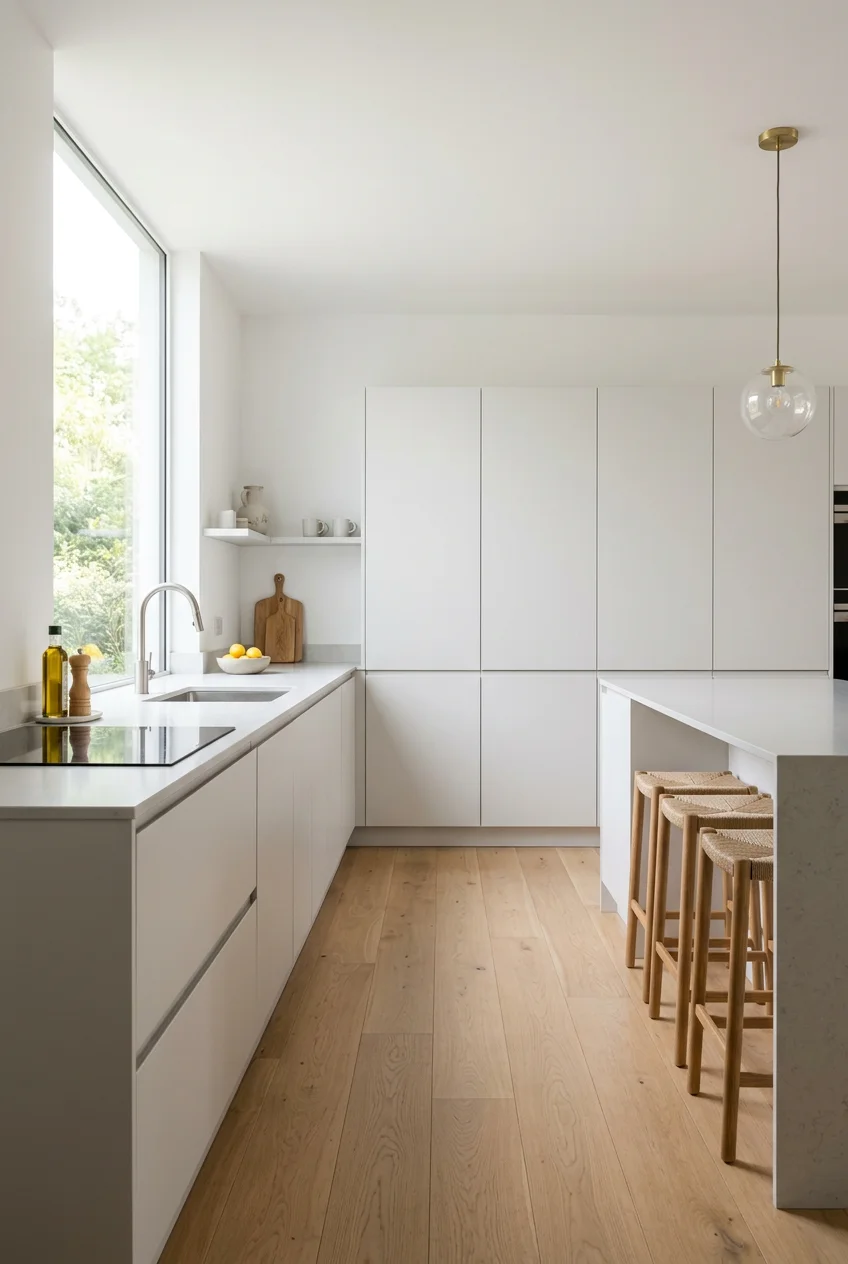
What’s Inside
- Embrace Handleless Cabinetry for a Seamless Look
- Integrate Appliances for an Uncluttered Aesthetic
- Adopt Warm Neutral and Earthy Color Palettes
- Maximize Storage with Smart Internal Organizers
- Prioritize Quality Materials and Matte Finishes
- Implement Layered and Integrated Lighting
- Adopt the Power of Half Decluttering Method
- Avoid Overcrowding and Respect Circulation Space
- Choose Multifunctional Tools over Single-Use Gadgets
- Install Deep Drawers Instead of Lower Doors
- Conceal Clutter with Hidden Coffee Stations
- Maximize Vertical Space with Floor-to-Ceiling Pantries
- Use Open Shelving Sparingly and Intentionally
- Soften the Look with Frosted Glass Accents
- Install Pull-Outs for Trash and Recycling
- Build Appliance Garages for Clear Countertops
- Secure Dishware with Pegboard Drawer Inserts
- Choose Monochromatic Hardware if Handles are Necessary
Last Tuesday at Whole Foods, I dropped a $7.99 glass jar of organic marinara sauce directly onto my toes because my pantry was so overstuffed I couldn’t see what I was grabbing. That red, garlic-scented explosion on the linoleum floor was the exact moment I realized I needed better cabinet ideas. Minimalist kitchen setups don’t just happen. If you’re tired of digging through chaotic shelves and feeling overwhelmed every time you cook, I’ll show you how to strip away the visual noise and build a space that breathes. Let’s fix this mess together.
1. Embrace Handleless Cabinetry for a Seamless Look

Let’s talk about the ultimate sleek look. I’m obsessed with handleless cabinetry. For the best cabinet ideas, minimalist kitchen designs start with the hardware. I tried standard brushed nickel pulls for years; my sweater pockets constantly caught on them. I finally switched to push-to-open mechanisms. The visual calm is immediate. But here’s the honest negative. If you bake a lot and have flour on your hands, push-to-open means you’re leaving a powdery handprint right on the wood. I spend time wiping down my lower cabinets with a damp $3.99 microfiber cloth from Target. It’s a trade-off. You get that uninterrupted surface, but you pay for it in maintenance. Still, I won’t go back. Removing handles gives you more physical clearance. Just keep a spray bottle of water and 2 tablespoons of white vinegar handy for smudges.
2. Integrate Appliances for an Uncluttered Aesthetic

Bulky stainless steel boxes ruin a minimalist vibe faster than anything else. I learned this the hard way when I bought a massive French door fridge on clearance at Costco for $1,299. It stuck out six inches past my counters and dominated the room. To fix this, you’ve got to integrate appliances behind custom cabinetry panels. Brands like Fisher & Paykel make incredible 36-inch built-in refrigerator models that sit flush with your cabinets. Yes, they cost upwards of $6,000, but the result is a kitchen that feels like a serene living space. This maximizes visual space. When the dishwasher blends perfectly into the lower cabinets, my brain registers a solid wall of warm oak. Pro tip: Make sure your cabinet maker leaves exactly 1/8 inch of clearance around the appliance panels. Otherwise, the wood will swell in summer humidity and the doors won’t open properly.
3. Adopt Warm Neutral and Earthy Color Palettes

We need to stop painting every minimalist kitchen stark, hospital white. It’s cold. I painted my first apartment kitchen pure white and it looked like a dentist’s office. Now, I’m fully embracing warm neutral color palettes. We’re seeing a shift toward nature-inspired tones. Think Sherwin-Williams Evergreen Fog or a creamy ivory. Pantone’s Cloud Dancer is a perfect soft neutral. I recently painted my island in Benjamin Moore Hale Navy, using 2 quarts of their premium matte finish ($55.99 per gallon). The dark blue grounds the space while my soft greige upper cabinets keep things airy. Cool grays and high-gloss finishes aren’t popular anymore because they show every water spot. Instead, try rich pale creams. When I walk into my kitchen at 6 AM, the soft taupe walls feel like a warm hug. Grab a $4.98 sample pot of warm khaki at Walmart to test the light.

Wagensteiger Stainless Steel Curved Garlic Presser or
A dependable everyday pick — Wagensteiger Stainless Steel Curved Garlic Presser or Cheese Grater pulls in 13 ratings at 4.5 stars. Not flashy, just solid.
4. Maximize Storage with Smart Internal Organizers

Minimalism isn’t just about what you can see. It’s about what you can’t. Maximizing storage with smart internal organizers prevents hidden clutter. I used to own a corner cabinet that was a black hole for Tupperware. I’d lose 4 oz plastic containers in the back for months. To fix this, I installed a $49.99 Rev-A-Shelf lazy Susan. Now, with one spin, I can reach my 1/2 cup measuring cups instantly. You absolutely need drawer dividers and custom wooden inserts. Don’t buy those flimsy plastic trays. Invest in solid bamboo dividers. I found a great set at Kroger for $14.99. Toe-kick drawers are another brilliant idea for flat items like baking sheets. You just tap the bottom panel with your foot and a shallow drawer pops out. A common mistake is buying organizers before measuring. If your drawer is 18.5 inches wide, a 19-inch bamboo insert won’t fit.
5. Prioritize Quality Materials and Matte Finishes

Glossy cabinets reflect light, but in practice, they reflect every single smudge and grease splatter. I’m prioritizing quality materials and matte finishes. Matte finishes offer an understated sophistication that makes dark tones feel modern. I paired matte white upper cabinets with natural walnut lower cabinets; the texture contrast is beautiful. Natural wood like oak or walnut adds a tactile warmth that painted MDF can’t replicate. Last year, I bought a cheap, glossy gray cabinet for my laundry room. Within three weeks, the shiny surface highlighted every scratch. Matte surfaces absorb light, creating a softer atmosphere. If you’re going with dark matte cabinets, here’s a warning. Matte black shows dust terribly. I’ve got to wipe down my matte black pantry door with a dry Swiffer cloth ($11.99 for a box of 32 at Target) twice a week. Pair matte cabinets with natural stone countertops to avoid a flat look.
6. Implement Layered and Integrated Lighting

Good lighting is the cheapest way to make your kitchen look expensive. I used to chop onions under a harsh overhead bulb and wonder why my kitchen felt dingy. You’ve got to implement layered lighting. I installed ultra-thin LED task lighting strips right under my wall cabinets. I bought a 16-foot roll on Amazon for $22.99. They illuminate my prep areas without adding visual clutter to the ceiling. The trick is to position the under-cabinet lighting slightly in front of you, near the front edge of the upper cabinet. If you push the lights all the way to the back wall, you’re going to cast shadows on your cutting board. This is a huge mistake most people make. I also added recessed spotlights on a $24.50 Lutron dimmer switch. Lowering the lights to 20 percent brightness at night is relaxing. Layer your lighting with warm white bulbs (2700K to 3000K). You might also like: 20 Cozy Simple Living Tips You Can Try Today

Mfacoy Spoon Rest for Stove Top
If you want something that just works, Mfacoy Spoon Rest for Stove Top is a safe bet (790 reviews, 4.5 stars).
7. Adopt the Power of Half Decluttering Method

You can’t organize your way out of owning too much stuff. I bought fourteen different acrylic bins and my cabinets still looked like a disaster. For a truly minimalist kitchen, you’ve got to adopt the power of half decluttering method. Here’s how it works. Take a large cardboard box. Open your main dishware cabinet. Put exactly half of your plates and glasses into the box. Tape it shut and put it in the garage for three months. I did this last January. I’ve got a bad habit of collecting random coffee mugs, and I owned 14 of them. I kept my 7 favorites and boxed the rest. I didn’t miss a single one. In April, I drove that heavy box straight to Goodwill. The key to minimalist decor is creating empty space inside your cabinets. When you see three inches of empty air between your plates, your brain physically relaxes. You might also like: 20 Cozy Minimalist Saving Money Lifestyle Tips You Need to See
8. Avoid Overcrowding and Respect Circulation Space

Minimalism isn’t just about the cabinets themselves. It’s about the empty air between them. A critical mistake I see constantly is overcrowding the kitchen footprint. I once lived in a townhouse where the kitchen island was barely 30 inches away from the main sink counter. Every time I opened the dishwasher, it blocked the entire walkway. I’d trap myself in the corner just to load dirty forks. You must respect circulation space. You need a minimum of 1.2 meters, which is roughly 4 feet, between open cabinet doors or between an island and your base cabinets. This allows comfortable movement. If two people are cooking, you shouldn’t be bumping hips. Failing to allow enough circulation space makes a kitchen feel cramped. If your kitchen is small, skip the trendy island entirely. Opt for a simple galley layout or an L-shape to leave room to breathe. You might also like: 15 Cozy 2026 Capsule Wardrobe Ideas That Are Totally Worth It
9. Choose Multifunctional Tools over Single-Use Gadgets

If you open my top drawer, you won’t find a garlic press or an avocado slicer. Single-use gadgets are the enemy of minimalist cabinets. I used to buy every clever little tool I saw at Trader Joe’s. I bought a $9.99 plastic avocado tool that took up way too much space and broke after three months. Now, I choose multifunctional tools. A high-quality, 8-inch Wüsthof chef’s knife ($170) does the job of twenty different plastic slicers. When you limit your tools, your drawers stay perfectly organized. I also swear by 16 oz glass Mason jars. I buy a case of twelve for $12.99 at Kroger. I use them as drinking glasses for iced coffee, storage containers for leftover soup, and for shaking up homemade salad dressing with 3 tablespoons of olive oil. They stack neatly and don’t stain like plastic. If a tool doesn’t do at least three different jobs, it doesn’t belong.

Kitchen Utensils Set – 34 PCS Non-Stick Silicone Cooking
Kitchen Utensils Set – 34 PCS Non-Stick Silicone Cooking Utensils Set has been one of the most consistently praised picks in this category. 195 reviewers averaged 4.5/5.
10. Install Deep Drawers Instead of Lower Doors

If I could give you only one piece of advice for base cabinets, it’s this. Stop installing doors with fixed shelves on your lower cabinets. I spent years getting on my hands and knees on hard tile floors, digging blindly into the dark recesses of a lower cabinet just to find a baking sheet. It’s exhausting. Instead, I’m a huge advocate for installing deep, heavy-duty drawers. A stack of three 30-inch wide drawers is a lifesaver. You pull the drawer out, and everything is instantly visible from above. I keep my heavy cast iron skillets in the bottom drawer, stacked neatly. Even my heavy 5.5-quart Le Creuset Dutch oven ($420) sits perfectly in a deep drawer. Pro tip: Make sure you upgrade the drawer glides to heavy-duty, soft-close hardware rated for at least 100 pounds. Standard 50-pound glides will warp and break. Drawers keep your cabinet fronts looking horizontal and streamlined.
11. Conceal Clutter with Hidden Coffee Stations

I love my morning coffee, but I hate looking at coffee gear all day. My old counter used to be cluttered with a bulky espresso machine, a burr grinder, loose beans, and sticky syrup bottles. It looked chaotic. To fix this, I built a hidden coffee station behind retractable pocket doors. When the doors are closed, it’s just a tall, sleek pantry cabinet. But when I slide those doors back into the cabinet frame at 6 AM, my entire coffee bar is revealed. I keep my $499 Breville Bambino Plus, a digital scale, and exactly one 12 oz bag of locally roasted beans inside. I had my electrician install an outlet directly inside the cabinet so I never have to move the machine. Here’s the negative. Pocket doors take up about 3 inches of internal cabinet width on each side. You lose a little storage space, but hiding the visual clutter is worth it.
12. Maximize Vertical Space with Floor-to-Ceiling Pantries

Instead of breaking up your kitchen with upper and lower cabinets everywhere, consolidate your storage into a floor-to-ceiling pantry wall. I did this on the back wall of my kitchen, installing flat-panel oak cabinets that run straight from the floor to the 9-foot ceiling. It’s like a massive closet for the kitchen. I can fit my broom, my vacuum, and a massive 15-pound bag of rice I bought at Sprouts for $18.99 all in one zone. By concentrating the tall, heavy storage on one wall, I was able to leave the other walls completely bare. No upper cabinets at all. This makes the kitchen feel incredibly spacious. One mistake I made initially was making the pantry shelves too deep. I’ve got 24-inch deep shelves, and things kept getting lost in the back. I retrofitted them with pull-out wooden trays. If you’re building a tall pantry, insist on roll-out shelves for anything below eye level.

Public Goods Kitchen Tool Set | 6 Piece Kitchen Utensil Set
If you want something that just works, Public Goods Kitchen Tool Set | 6 Piece Kitchen Utensil Set | Includes is a safe bet (35 reviews, 4.5 stars).
13. Use Open Shelving Sparingly and Intentionally

Open shelving is a massive trend, but most people get it completely wrong. They rip down all their upper cabinets and install four massive rustic wood shelves, then fill them with 50 different colorful mugs and random cookbooks. That isn’t minimalist. That’s just putting your clutter on display. I tried this in my last apartment and hated it. The dust mixed with cooking grease and created a sticky film on my bowls within weeks. If you want open shelving, do it sparingly. I’ve got exactly two floating white oak shelves, each only 24 inches long. I keep exactly 6 matching white ceramic plates ($5.99 each from Target) and 4 clear glass tumblers on them. That’s it. It creates a small, airy focal point without overwhelming the space. You’ve got to be ruthless about editing what sits on an open shelf. Everything must match your color palette. Hide mismatched plastic cups behind a solid door.
14. Soften the Look with Frosted Glass Accents

Solid slab doors are great, but sometimes a wall of continuous wood or painted MDF can feel a bit heavy, especially in a small kitchen. I didn’t want open shelving because of the dust issue I just mentioned, so I compromised with frosted glass accents on two of my upper cabinets. Frosted or fluted glass is brilliant. It bounces light around the room and adds a beautiful textural element, but it obscures the exact contents of the cabinet. You get the airy feel of glass without the pressure of keeping the inside perfectly styled. I keep my baking supplies in there. Even if my 2 lb bag of brown sugar is slightly messy, through the frosted glass, it’s just a soft, blurry shape. I bought custom frosted glass inserts for my existing cabinet doors for $65 each at a local glass shop. It’s a cheap upgrade that changed the vibe completely.
15. Install Pull-Outs for Trash and Recycling

Nothing ruins a serene, minimalist kitchen faster than a plastic freestanding trash can sitting at the end of the island. I used to own a stainless steel step-can that constantly got in the way, and the lid would bang against the wall every time I threw away an onion skin. You’ve got to integrate your waste management. I installed a double 35-quart pull-out trash and recycling center inside an 18-inch base cabinet. I bought the heavy-duty Rev-A-Shelf unit on Amazon for $89.99. It slides out smoothly, hides the garbage completely out of sight, and contains the smells. Pro tip: Install this pull-out cabinet directly next to your sink and prep area. You want to be able to sweep vegetable peels directly off your cutting board into the bin without walking across the room. I also highly recommend buying a pull-out unit that comes with a solid lid that stays inside the cabinet.
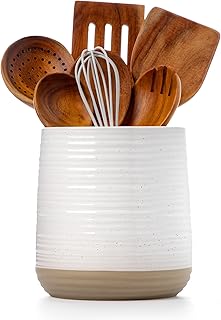
6.8" Large Ceramic Kitchen Utensil Holder
If you want something that just works, 6.8″ Large Ceramic Kitchen Utensil Holder – Utensil Holder for Kitchen is a safe bet (194 reviews, 4.5 stars).
16. Build Appliance Garages for Clear Countertops

We already talked about hiding the coffee maker, but what about the toaster, the blender, and the stand mixer? When you’re brainstorming cabinet ideas, minimalist kitchen designs require clear countertops. Visual clutter on the counters creates mental clutter. I built an appliance garage in the corner of my L-shaped kitchen. It’s a countertop-level cabinet with a lift-up door on hydraulic hinges. Inside, I keep my $39.99 stainless steel toaster and my heavy Vitamix blender. They stay plugged into the wall outlet hidden inside the garage. When I need to make a smoothie, I lift the door, blend my 1 cup of spinach and frozen berries, and shut the door. The mess is instantly hidden. I used to leave my toaster on the counter, and the breadcrumbs would scatter everywhere. An appliance garage solves this completely. Just make sure your cabinet maker leaves enough vertical clearance. Measure your tallest appliance before building.
17. Secure Dishware with Pegboard Drawer Inserts

If you’re taking my advice and moving your plates and bowls into deep lower drawers, you need a way to keep them from sliding around and chipping when you open the drawer. I learned this the hard way when I slammed a drawer shut and chipped the edge off my favorite $12 pasta bowl. The solution is pegboard drawer inserts. I bought a trimmable wooden pegboard system from a cabinet supply store for $45. You cut the wooden baseboard to fit your exact drawer dimensions, drop it in, and then insert these 6-inch wooden pegs into the holes to create custom bumpers around your stacks of plates. It’s incredibly satisfying to set up. I’ve got a tight cluster of pegs holding my 8 dinner plates perfectly in place. The best part is that as your dishware changes over the years, you just pull the pegs out and rearrange them.
18. Choose Monochromatic Hardware if Handles are Necessary

I know I started this by praising handleless cabinets, but I get it. Some people hate the push-to-open mechanisms, or they’ve got heavy integrated fridge panels that require a physical handle to pull open. If you absolutely must have cabinet hardware, the minimalist solution is monochromatic hardware. You want the handles to blend into the cabinetry, not stand out as jewelry. I’ve got a tall pantry door painted in Sherwin-Williams Iron Ore. Instead of brass or brushed nickel pulls, I bought a sleek, 12-inch matte black edge pull for $14.50. It mounts flush to the top edge of the door and practically disappears into the dark paint. If you’ve got white cabinets, use matte white hardware. I bought a set of cheap silver knobs at Walmart once, and they looked so cluttered I took them off three days later. Monochromatic is the way to go.
Minimalism isn’t about living in an empty, sterile white box. It’s about designing a space that actually serves you, where you don’t have to fight past clutter just to make a simple plate of scrambled eggs. I’ve made so many mistakes trying to get my kitchen right, from buying too many acrylic bins to fighting with glossy cabinets that showed every single smudge. But once you implement these strategies, the peace you feel in your kitchen is unbelievable. Honestly, they changed how I function in my home every single day. Take a weekend, grab a box, and start with the power of half. You’ll be amazed at how light you feel. If you found these tips helpful, please save this article or pin it to your favorite kitchen inspiration board on Pinterest. I’m always tweaking and updating my space, so check back for more ideas soon!
Frequently Asked Questions
What are the best colors for minimalist kitchen cabinets?
Skip stark white and opt for warm neutrals. Soft taupe, creamy ivory, and nature-inspired tones like Sherwin-Williams Evergreen Fog are perfect. Matte finishes in pale creams or deep browns add warmth without the sterile feel of high-gloss grays.
How do I hide appliances in a minimalist kitchen?
I’ve found that integrating appliances behind custom cabinetry panels is the best method. You can also build an appliance garage with a lift-up door to conceal smaller items like your toaster and blender right on the countertop.
Are handleless cabinets a good idea?
They provide a beautiful, seamless look that defines minimalism. However, push-to-open mechanisms can show fingerprints and smudges easily, especially if you bake often. It’s a trade-off between a sleek aesthetic and slightly more frequent wiping down.
How much space should be between a kitchen island and cabinets?
You need a minimum of 1.2 meters, or about 4 feet, of circulation space. Overcrowding your floor plan makes the kitchen feel cramped. Leaving enough empty space ensures two people can cook comfortably without bumping into each other.
