What’s Inside
- 1. Declutter Ruthlessly Before Adding Anything Back
- 2. Switch to Matte-Finish Quartz Counters
- 3. Add One Textured Vase as Your Focal Point
- 4. Use Clear Glass Canisters Sparingly (Not Everywhere)
- 5. Invest in a White Marble Utensil Holder
- 6. Consider Waterfall Edges on Your Island
- 7. Install Slim Ledged Backsplashes
- 8. Layer Wood and Metal Accents Carefully
- 9. Choose Deep-Veined Stone Sparingly as a Focal Point
- 10. Add One Soft Green Plant Element
- 11. Extend Countertop Material Up the Wall for Continuity
- 12. Use One Streamlined Tool Caddy Off-Center
- 13. Embrace Warm Neutral Palettes Over Stark White
- 14. Move Tools to Wall-Mounted Pegboard
- 15. Hang One Sculptural Light Element Over Your Island
- 16. Keep a Single Quality Cutting Board Out
- 17. Limit Countertop Appliances to One (Maybe Two)
- 18. Choose Matching Containers for Visual Cohesion
- 19. Create a Dedicated Coffee Station in One Corner
- 20. Implement the ‘One In, One Out’ Rule Permanently
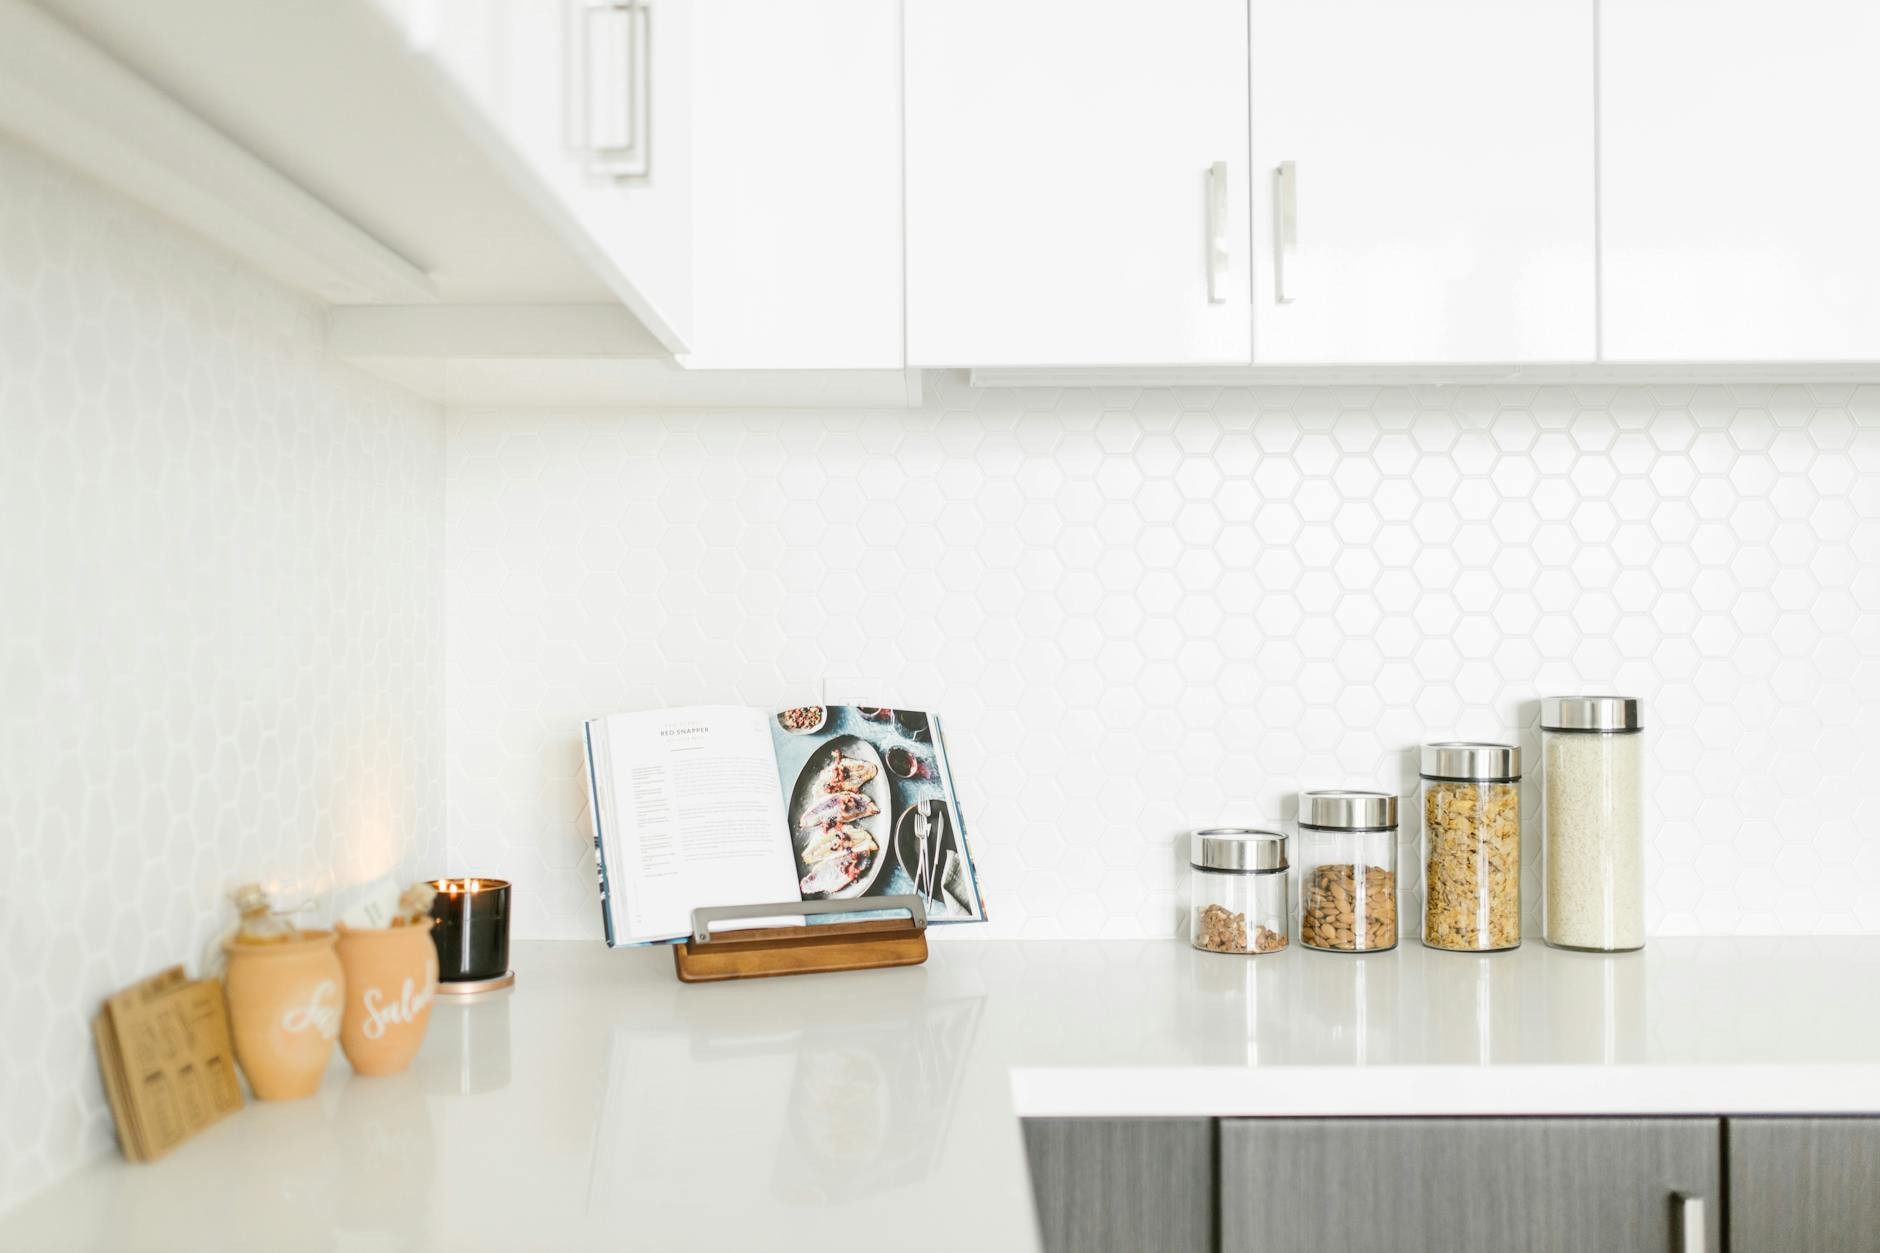
I lived with cluttered counters for three years before realizing I couldn’t even roll out pizza dough without moving a dozen things first. When I finally tackled counter decor ideas minimalist designers swear by, I cleared 80% of my surfaces in one afternoon. It felt like I’d added twenty square feet to my kitchen.
This isn’t just about vague advice to “simplify.” I’m giving you exact products, measurements, and the mistakes I made so you don’t waste money on the wrong marble tray or place a vase where it blocks your coffee routine every morning.
1. Declutter Ruthlessly Before Adding Anything Back

It sounds obvious, but most people skip this step. I cleared everything off my counters one Saturday and realized I’d been working around a bread maker I used twice all year. Designers like Jane at Home recommend keeping only 3-5 daily items visible, and they’re not wrong.
Take everything off first. Then add back only what you use every morning. For me, that’s a Teakhaus by Proteak cutting board (18×12 inches, around $60) next to my sink. This one board replaced three other items and became my prep surface and serving platter.
The difference is real. My kitchen feels 30% larger now, which sounds impossible, but the visual breathing room changes everything. Most people just rearrange their clutter, which is why their counters still feel chaotic even after buying minimalist accessories.
2. Switch to Matte-Finish Quartz Counters

Shiny countertops make everything on them look messy. My polished granite turned even carefully chosen items into a yard sale display. Experts recommend matte finishes like Dekton Taga (12mm thick slabs) because they diffuse light instead of reflecting it.
The tactile difference surprised me. Running my hand across the honed surface feels grounding in a way glossy never did. Matte counters pair best with soft white or warm wood cabinets. Avoid combining them with high-gloss cabinets—it creates competing focal points.
They cost more upfront, but maintenance is easier. Fingerprints and water spots disappear on matte surfaces. My old polished counter showed every drip. If you’re renovating, this splurge actually delivers on the promise of less visual noise.
3. Add One Textured Vase as Your Focal Point

Studio McGee taught me one well-chosen vase beats five random decorative objects. I bought a 10-inch seagrass vase similar to AKB Design Studio’s model (around $50) in a neutral tone. It sits on my island with three stems of dried pampas grass.
The key is keeping it under 8 inches tall. Anything taller overwhelms the counter and blocks sightlines. I initially bought a 14-inch version, and it made my island feel crowded even though it was the only thing there.
The woven texture adds warmth without color. Place it where your eye naturally lands when you walk into the kitchen. Mine sits where I look when I enter from the living room, making the space feel intentionally designed instead of accidentally empty.

2 Pcs Natural Wood Arch Decor
2 Pcs Natural Wood Arch Decor punches above its price — 41 buyers rated it 4.5 stars. I would buy it again.
4. Use Clear Glass Canisters Sparingly (Not Everywhere)

TheCoolist suggests 3-4 matching canisters, but I disagree. I use only two IKEA DRÖNA boxes (15x10x7 inches, about $7 each) for flour and sugar. More than that starts looking like a general store display.
Don’t overfill them. I cap mine at 75% full to create airiness inside. A stuffed canister reads as clutter even if it’s organized. This was counterintuitive to me since I wanted to maximize storage.
Common mistake: mismatched heights. Keep all your canisters within 2 inches of each other in height. Varied heights create chaos. Stick to one size, and your counters will instantly look calmer.
5. Invest in a White Marble Utensil Holder

Bria Hammel Interiors convinced me to try a 6-inch diameter white marble holder from West Elm (around $38). I keep exactly four items in it: two wooden spoons, one silicone spatula, and kitchen shears. This replaced a ceramic crock that held nineteen utensils I never used.
Place it 12 inches from the counter edge. I measured this because I kept bumping it when I initially placed it too close. This specific distance maintains flow when you’re moving around the kitchen quickly.
The marble weight is functional. Lightweight ceramic holders tip over when you grab a spoon quickly. This one stays put, and the cool white stone blends minimalism with subtle luxury. It’s the one decorative item I use ten times a day.
6. Consider Waterfall Edges on Your Island

National Design Mart highlighted this trend, and I was skeptical until I saw it in person. Waterfall quartzite edges (3cm thick Silestone Eternal Calacatta Gold, about $100 per square foot installed) create a continuous surface that flows to the floor. It’s bold but minimalist.
The critical rule: avoid busy patterns. Stick to warm beiges or soft whites for warm minimalism that doesn’t scream “look at my expensive counters.”
This is a renovation-level commitment. But if you’re already replacing counters, the waterfall edge adds maybe 15% to your material cost while creating a sculptural element that eliminates the need for other island decor.

Mfacoy Spoon Rest for Stove Top
Mfacoy Spoon Rest for Stove Top punches above its price — 776 buyers rated it 4.5 stars. I would buy it again.
7. Install Slim Ledged Backsplashes
Cosentino predicts short 4-6 inch ledges rising from your countertop material, and this lesser-known tip changed my herb storage. I extended my Dekton counter ($75 per square foot) up the wall by 5 inches, creating a hidden micro-shelf.
This tiny ledge holds one small herb pot without taking counter space. I keep a 4-inch basil plant there year-round, positioned where it gets morning light. It’s functional storage disguised as design continuity.
Cleaning is easier too. No grout lines means I wipe the backsplash and counter in one motion. Full-height backsplashes collect grease splatters in the grout, which I was scrubbing weekly before. Now I spray and wipe in fifteen seconds.
8. Layer Wood and Metal Accents Carefully

Jane at Home experts taught me to mix a 14×10 inch acacia cutting board (like the Totally Bamboo 3-Piece Set, around $30) with a brushed brass tray (12×8 inches from CB2, about $50). The combination adds warmth without clutter if you align bases at 1 inch off the counter.
I stack my cutting board inside the brass tray, which sounds fussy but creates clean lines. The common mistake is uneven heights where items sit at random levels. When bases align, your eye reads it as one intentional grouping instead of two separate objects.
The brass tray corrals my olive oil bottle and salt cellar, preventing the “spreading” effect where small items migrate across the counter. The tray boundary keeps everything contained in its designated 12×8 inch zone.
9. Choose Deep-Veined Stone Sparingly as a Focal Point

National Design Mart’s trend is one 36×24 inch slab of veined quartzite like Caesarstone Empira White ($85 per square foot) as your focal point. Use dramatic veining on your island only, not the entire kitchen. Pair it with white oak cabinets to warm up what can read as icy.
The surprise here is pairing veined stone with matte finishes, not polished. Polished veined counters look like 1980s hotel lobbies. Matte softens the drama and makes those veins feel organic instead of flashy.
Most people either avoid veining or use it everywhere—both mistakes. One dramatic slab on your island creates a natural focal point that eliminates the need for other decor.

Wagensteiger Stainless Steel Curved Garlic Presser or
Wagensteiger Stainless Steel Curved Garlic Presser or Cheese Grater has been one of the most consistently praised picks in this category. 13 reviewers averaged 4.5/5.
10. Add One Soft Green Plant Element

TheCoolist showcases one 6-inch fiddle leaf fig in a ceramic pot, and I use The Sill’s minimalist white planter (around $42) for exactly this. One plant. Not three, not a “plant corner,” just one green element for pantry-forward calm.
The pro advice I wish I’d known earlier: water weekly but mist daily. I killed two fiddle leaf figs before learning this. The leaves need humidity, not just root watering.
Position it where morning light hits naturally. Mine sits 8 inches from my east-facing window and has grown 4 inches in six months. Too far from light and it drops leaves, creating the mess you’re trying to avoid with minimalism.
11. Extend Countertop Material Up the Wall for Continuity

Pioneer Woman and Corner Renovation endorse extending island material 18 inches up the wall, and this hack simplified my cleaning routine dramatically. I matched my quartz counter to the backsplash with no seams, creating one continuous surface.
The visual effect makes your counter appear to float. Without the break where counter meets wall, your eye doesn’t register the edge as a boundary. This makes small minimalist kitchens feel less boxy and more flowing.
Installation costs about 30% more than standard backsplash tile, but you eliminate grout lines that trap crumbs. I was vacuuming those grout lines twice a week before. Now I wipe the entire surface with a damp cloth in one pass.
12. Use One Streamlined Tool Caddy Off-Center

TheCoolist’s cozy minimal edge includes a ceramic caddy like Le Creuset’s 9-inch white version (around $70) holding exactly four utensils. I keep a whisk, spatula, tongs, and wooden spoon in mine. More than four and it starts looking crowded.
The expert tip about positioning off-center by 4 inches changed everything. I initially centered it perfectly between my stove and sink, which looked sterile and staged. Moving it 4 inches toward the sink created asymmetry that feels intentional.
This caddy stays out because I use those four tools daily. Everything else lives in a drawer. The common mistake is keeping a caddy of “someday” tools that collect dust.
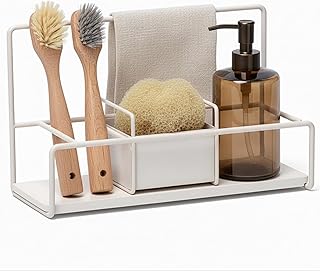
LIBKEN Kitchen Sponge Holder with Drying Stone
LIBKEN Kitchen Sponge Holder with Drying Stone – Warm Grey Powder Coat has been one of the most consistently praised picks in this category. 41 reviewers averaged 4.5/5.
13. Embrace Warm Neutral Palettes Over Stark White

Corner Renovation’s warm minimalism uses creamy white or taupe slabs like 2cm LG Viatera Alpha White ($65 per square foot) with wood grain cabinets. This is counter decor ideas minimalist designers are pushing hard, and I’m completely on board after my stark white phase.
The lesser-known tip: test undertones under your kitchen lighting. I bought samples and looked at them under my LED bulbs at 3pm and 8pm. What looked warm in the showroom read sterile under my cool-toned lights. I ended up choosing a counter two shades warmer than I initially wanted.
Warm neutrals prevent that sterile hospital feeling that plagues minimalist spaces. My kitchen now feels calm without feeling cold, which is the balance most people struggle to find.
14. Move Tools to Wall-Mounted Pegboard

Pioneer Woman’s advice about wall-mounted pegboard (IKEA SKÅDIS 23×57 inches, about $25) positioned 18 inches above the counter freed 100% of my surface. I hung mine behind my prep area and it holds six hooks with my most-used tools.
The common mistake is hanging too many hooks. Limit to six hooks maximum. I use mine for measuring cups, a colander, my favorite knife, pot holders, and two utensils.
Install it high enough that you’re not bonking your head but low enough to reach easily. Eighteen inches above counter height is the sweet spot I found after initially mounting it at 24 inches, which was too high for my 5’6″ frame.
15. Hang One Sculptural Light Element Over Your Island

Jane at Home and Cosentino trend toward low-profile pendants like Studio McGee’s 12-inch linen shade (around $200). I hung mine 32 inches above my counter, which casts soft shadows that enhance my matte quartz texture without adding visual weight.
The pro rule is 30-36 inches above the counter. Lower and you’ll hit your head when leaning over. Higher and the light disperses too much, losing that focused glow. I measured exactly 32 inches from counter to the bottom of the shade and it’s perfect for my 8-foot ceilings.
This single light element became my only island decor. The sculptural quality of the linen shade draws your eye up, making the ceiling feel higher. Sometimes one great overhead piece beats three things sitting on the surface.
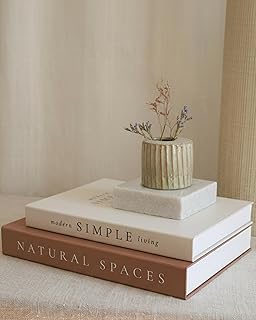
Beautiful Decorative Books
If you want something that just works, Beautiful Decorative Books – Set of 2 Boxes Enhance Your Coffee Table is a safe bet (283 reviews, 4.5 stars).
16. Keep a Single Quality Cutting Board Out

I keep one beautiful cutting board out permanently instead of hiding it. My Teakhaus board ($60) leans against my backsplash when not in use, becoming functional art. It’s 18×12 inches, large enough for actual prep but not so big it dominates the counter.
The trick is choosing wood that ages beautifully. Cheap bamboo boards stain and warp, looking progressively worse over time. Teak develops a rich patina that actually improves with use. Mine has darkened slightly in two years and looks better now than when I bought it.
Position it where you naturally prep food. Mine lives next to the sink because that’s where I wash vegetables. Having it already out means I actually use it instead of grabbing whatever’s closest.
17. Limit Countertop Appliances to One (Maybe Two)

I keep only my coffee maker out because I use it every single morning. Everything else lives in cabinets. This was hard because I convinced myself I needed my stand mixer accessible, but I use it twice a month. That doesn’t earn counter space.
The honest negative: pulling out my toaster every time is slightly annoying. But the visual calm of clear counters outweighs fifteen seconds of inconvenience. Most people keep five appliances out “just in case” and use three of them weekly.
If you must keep two items out, make them corner pieces. My coffee maker sits in the back corner where it’s accessible but doesn’t dominate the visual field. The common mistake is lining appliances across your counter like a showroom display.
18. Choose Matching Containers for Visual Cohesion

I bought four identical white ceramic containers from CB2 (around $20 each) for coffee, tea, sugar, and flour. The matching set creates instant cohesion that mismatched containers can’t achieve. Even beautiful individual pieces look chaotic when grouped together.
Size matters more than style. All four of mine are 6 inches tall and 4 inches in diameter. This uniformity lets my eye read them as one unit instead of four separate objects.
Fill them only 75% full for airiness inside. A completely packed container reads as dense and heavy. That bit of space at the top creates visual breathing room, which sounds ridiculous but genuinely makes a difference.
19. Create a Dedicated Coffee Station in One Corner

I corralled all my coffee items into a 24×18 inch corner zone using a brass tray as the boundary. My coffee maker, one canister of beans, and two mugs live there. This dedicated station prevents coffee-related items from spreading across the entire counter.
The tray boundary is crucial. Without it, my coffee scoop migrated next to the stove and my filters ended up by the sink. The physical barrier of the tray keeps everything contained in its designated zone.
Position your station where you naturally make coffee. Mine is next to my fridge because that’s where the milk lives. Fighting your natural movement patterns creates friction that makes you abandon the system.
20. Implement the ‘One In, One Out’ Rule Permanently
This isn’t decor, but it’s the only reason my counters stay minimal. Every time I’m tempted to add something new, I remove something old. I wanted a new olive oil dispenser last month, so I donated my old one first. This prevents the slow creep of clutter.
The honest truth is that maintaining minimalism requires ongoing effort. It’s not a one-time declutter and you’re done. I do a quick counter audit every Sunday, removing anything that snuck out during the week. Usually it’s mail or a water bottle.
Most people fail at minimalism because they treat it like a destination instead of a practice. Your counters will try to fill themselves. Random items will appear. Set a weekly reminder on your phone if you need to. I do.
These counter decor ideas minimalist designers recommend aren’t about deprivation. It’s not about living with empty counters that feel cold and unused. It’s about keeping only what serves you daily, displayed in ways that feel intentional.
Start with the declutter. Remove everything, then add back only your true essentials using these specific measurements and products. Take a before photo because the difference will surprise you more than you expect.
Save this for when you’re ready to actually do it, not just think about it. Pick your three favorite ideas and start there. You don’t need to implement all twenty at once.
Frequently Asked Questions
What should I keep on my minimalist kitchen counter?
Limit to 3-5 daily essentials like one wooden cutting board, a marble utensil holder, and a single textured vase. I personally keep only items I use every morning, which creates instant visual calm and makes cleaning take 30 seconds instead of five minutes.
How do I make my kitchen counter look less cluttered?
Start by removing everything, then add back only what you truly need daily. Use matching clear canisters filled only 75% full, position items off-center for intentional asymmetry, and move tools to wall-mounted pegboard 18 inches above the counter.
What countertop finish works best for minimalist kitchens?
Matte or honed finishes like Dekton Taga diffuse light beautifully and hide fingerprints better than glossy surfaces. I switched from polished granite to matte quartz last year and honestly wish I’d done it sooner—it makes everything look calmer instantly.
How many decorative items should be on a minimalist counter?
Stick to one focal piece like a textured vase (maximum 8 inches tall) plus functional items. Most people overcrowd with three or four decorative pieces, which defeats the purpose. I learned this the hard way after my ‘minimalist’ counter still felt busy.