What’s Inside
- Ruthlessly Declutter and Purge Duplicates
- Invest in Multi-Functional Appliances
- Prioritize Integrated and Compact Appliances
- Embrace Handleless Cabinetry and Flat-Panel Doors
- Optimize Storage with Smart Inserts and Vertical Solutions
- Choose a Curated, Warm Color Palette
- Invest in High-Quality, Stackable Cookware
- Streamline Dishware and Glassware
- Adopt Sustainable Food Storage Solutions
- Master the Kitchen Triangle for Workflow Efficiency
- Conceal Small Appliances and Utensils
- Integrate Lighting Thoughtfully
- Personalize a Simple Minimalist Kitchen with Intentional Decor
- Embrace Matte Finishes for Durability and Aesthetics
- Utilize Door Storage and Corner Solutions
- Maintain the System with Daily Habits
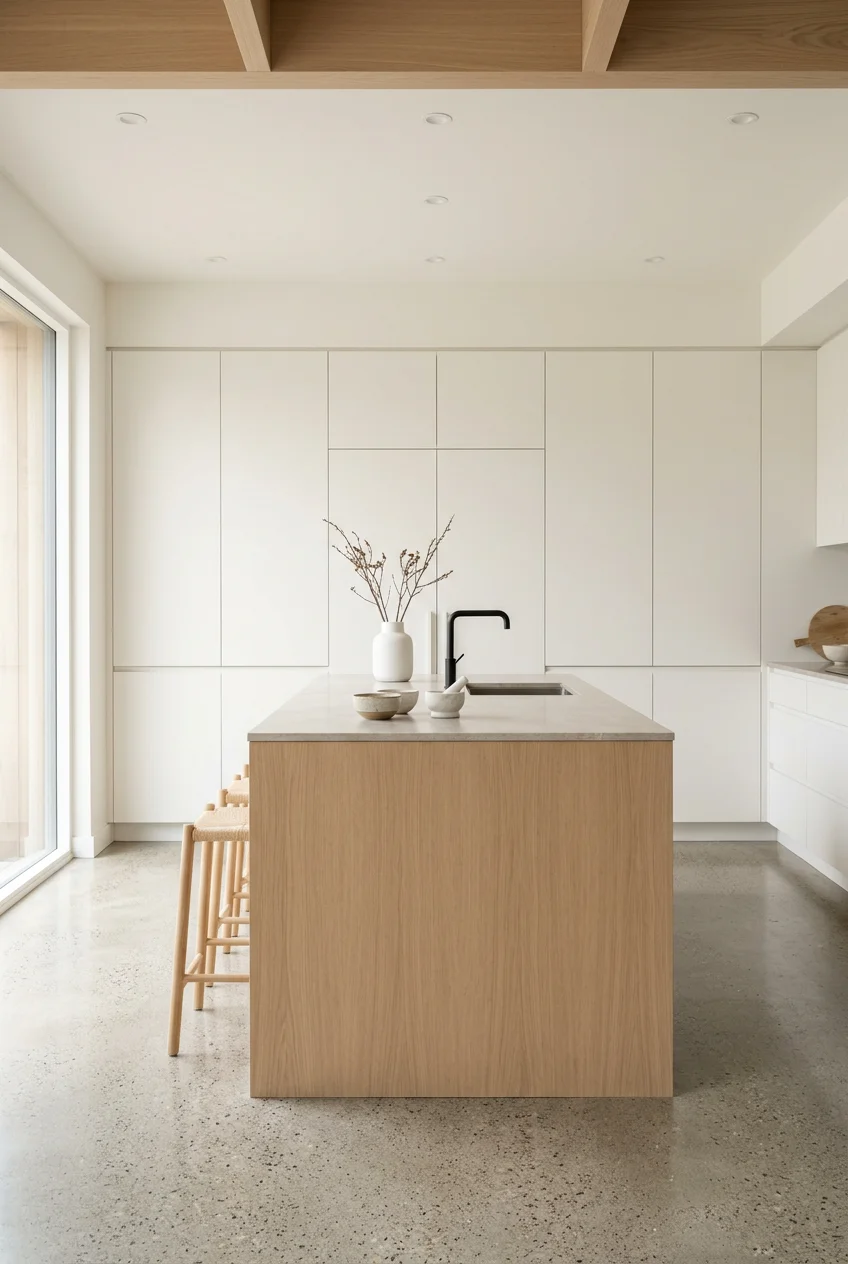
Last Tuesday at Whole Foods, I stood in the parking lot dreading the drive home. I knew a simple minimalist kitchen didn’t exist in my house, because every inch of my counter was covered in junk mail and unused gadgets. I tried open shelving in 2021. It looked great for exactly three days before a fine layer of sticky grease and dust coated my white ceramic bowls. Don’t do it. Creating a functional space requires brutal honesty about what you actually use. Today, I’m sharing the exact steps I took to clear the visual noise.
1. Ruthlessly Declutter and Purge Duplicates

Start by emptying every cabinet and drawer. Last October, I pulled everything out and found three identical garlic presses. You don’t need three. A simple minimalist kitchen requires brutal honesty about what you actually use. The expert rule is to toss anything untouched in a year. I extend that to six months for countertop gadgets. I had a bulky Cuisinart panini press ($69.99 from Target) taking up 14 square inches of prime real estate. I used it twice in 2022. It smelled faintly of burnt cheese and gathered a sticky layer of cooking grease. I donated it. Common culprits include multiple sets of plastic measuring spoons, novelty mugs, and massive woks you never season properly. No storage bins from Walmart will save you if you simply own too much garbage. The physical weight of moving 40 excess mugs to a donation box teaches you a lot about your shopping habits. Empty the space completely. Wipe down the bare shelves with a damp microfiber cloth before putting anything back.
2. Invest in Multi-Functional Appliances

Instead of single-use gadgets, buy appliances that perform several tasks. I bought a Vitamix 5200 blender ($349.95, 64 oz container) last November. The motor is incredibly loud. It sounds like a lawnmower in the morning. But the friction actually heats soup to a boil in six minutes, meaning I got rid of my immersion blender and my juicer. The tradeoff of the noise is worth the reclaimed cabinet space. A speed oven is another highly functional choice for compact spaces. The Breville Smart Oven Pro costs $279.95. It measures exactly 18.5 by 15.7 inches. I fit mine perfectly in a corner near the fridge. It toasts, bakes, and roasts with ten preset functions. I stopped using my full-size gas oven for anything smaller than a whole chicken. My gas oven takes twenty minutes just to preheat and heats up the entire house. The Breville preheats in five minutes. Plan for these multi-use tools instead of a dedicated toaster, an air fryer, and a microwave crowding each other out.
3. Prioritize Integrated and Compact Appliances

Hidden functionality is the core of modern design. You don’t need a massive stainless steel refrigerator dominating the room. I learned this when I lived in a 600-square-foot apartment. I bought a 24-inch wide Bosch 500 Series compact refrigerator ($2,899.00) from Costco. It holds 11 cubic feet of food. That sounds small, but it forces you to buy fresh ingredients weekly instead of letting a 3-pound bag of spinach turn to green slime in the back of a cavernous crisper drawer. For cleaning, an 18-inch wide Miele slimline dishwasher ($1,499.00) handles a full day of dishes for two people without taking up a massive 24-inch cabinet slot. The trick is panel-ready appliances. You attach a cabinet door directly to the front of the fridge or dishwasher. When it’s closed, it looks like a regular flat-panel cabinet. My contractor measured wrong the first time, leaving a 1/2 inch gap that collected dust. Learned that the hard way. Once fixed, the clean visual result creates an incredibly calm space.

Wagensteiger Stainless Steel Curved Garlic Presser or
If you want something that just works, Wagensteiger Stainless Steel Curved Garlic Presser or Cheese Grater is a safe bet (13 reviews, 4.5 stars).
4. Embrace Handleless Cabinetry and Flat-Panel Doors

Traditional cabinet hardware catches on everything. I ruined a $60 wool sweater last winter when the pocket snagged on an oversized brass drawer pull while I was rushing to make coffee. To achieve a smooth look, choose flat-panel cabinetry with push-to-open mechanisms or integrated J-pull grooves. The flat surface reflects light evenly across the room. I installed push-to-open latches from Amazon ($14.99 for a 10-pack) on all my upper cabinets. You just press the corner of the door, and it pops open an inch. One negative is that if your hands are wet or greasy, you’ll leave a smudge directly on the cabinet face. You have to wipe the contact points down daily. I keep a spray bottle of 1 part white vinegar to 3 parts water under the sink for this exact reason. Despite the wiping, the absence of thirty metal knobs protruding into the room creates an incredibly quiet visual field. It makes a narrow galley layout feel noticeably wider.
5. Optimize Storage with Smart Inserts and Vertical Solutions

Maximizing hidden space means your counters stay empty. I use a Wüsthof 18-inch magnetic knife strip ($49.95). I mounted it directly into the tile backsplash above my prep zone. It holds exactly six knives. A bulky wooden knife block takes up at least 8 by 10 inches of counter space and collects breadcrumbs in the slots. For cabinets, vertical space is usually wasted. I bought simple wire stackable shelf organizers from Target ($16.99 each). They measure 14 inches wide by 8 inches tall. I place them in my upper cabinets to separate dinner plates from salad plates. Before I did this, I had to lift a heavy stack of 8 large plates just to get to a bowl. It was loud and inefficient. In the drawers, bamboo dividers keep utensils from turning into a tangled metal knot. Measure your drawer depth before buying these. I bought a set from Whole Foods on a whim, and they were 1/4 inch too tall, jamming my drawer shut for two days. You might also like: 20 Charming Minimalist Simple Living Lifestyle Tips Worth Trying This Year
6. Choose a Curated, Warm Color Palette

Stark white kitchens are out. They look like operating rooms and feel just as cold. The current trend leans heavily into warm undertones and natural textures. I painted my lower cabinets a muted olive green last spring. The exact shade is Sherwin-Williams Rosemary. It cost $85.00 for a gallon of their urethane trim enamel. I kept the upper cabinets a warm clay-toned white. The green grounds the space and hides the inevitable scuffs from shoes and vacuum cleaners much better than pure white. If you have a small room, lighter shades usually make the walls recede, but adding an earthy tone to the base cabinets creates depth. Choose one main color, two accent colors in the exact same temperature family, and stick to one metallic finish for the faucet and hinges. I use brushed nickel. Mixing brass, matte black, and chrome in a small room creates visual chaos. Warm tones absorb natural light beautifully, making the space feel inviting rather than clinical. You might also like: 15 Creative Aesthetic Minimalist Apartment That Changed Everything
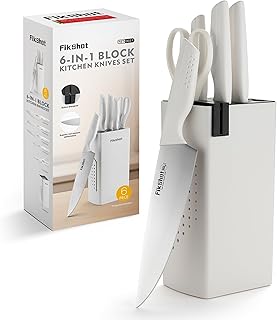
Knife Set, FIKSHOT 6-Piece Kitchen Knife Block Set with &
Honestly, Knife Set surprised me — sturdier than it looks in the photos, and over 116 buyers gave it 4.5 stars.
7. Invest in High-Quality, Stackable Cookware

Pots and pans are the worst offenders for cabinet clutter. The handles stick out, the lids slide around, and they never stack neatly. I threw out a mismatched collection of scratched Teflon pans and bought the Calphalon Premier Space-Saving Stainless Steel 10-piece set ($399.99). They are designed to nest completely flat. The flat glass lids stack directly on top of each other. The entire 10-piece set fits into a single 18-inch wide lower cabinet. For heavy cooking, I use a 5-quart Staub Cast Iron Stackable Cookware Set ($349.95). It includes a Dutch oven, a grill pan, and a braiser. All three pieces share one universal heavy iron lid and stack into a single 10-inch high tower. The cast iron is incredibly heavy. The full stack weighs over 20 pounds, so you have to store it on a reinforced bottom shelf, not an upper cabinet. Having three highly durable cooking vessels that take up the footprint of one pot completely changes how you organize your lower cabinets. You might also like: 15 Gorgeous Homemaking Simple Living Tips to Steal Right Now
8. Streamline Dishware and Glassware

You don’t need service for twelve if you live in a house of three. I used to keep 14 mismatched coffee mugs and a stack of chipped floral plates I inherited from an old roommate. Last January, I boxed them all up and dropped them at Goodwill. I replaced everything with simple, classic white porcelain plates from Target. They cost $3.00 each for the 10.5-inch dinner plates. I bought exactly six dinner plates, six salad plates, and six bowls. White food looks better on white plates. If I break one, I can walk into any Target and buy an identical replacement for three dollars. Storing only six plates means my cabinet is half empty. It also forces me to run the dishwasher or wash items by hand instead of letting a mountain of dirty dishes pile up in the sink for three days. A highly functional space works best when there is a natural bottleneck. Limited dishware is a built-in boundary that prevents massive messes.
9. Adopt Sustainable Food Storage Solutions

Plastic Tupperware stains, warps in the microwave, and retains the smell of old onions forever. I threw out an entire drawer of mismatched plastic lids last summer. I switched to the Pyrex 18-piece glass storage set ($34.99 from Amazon). The glass doesn’t hold odors. You can see exactly what is inside the fridge without opening lids. The rectangular 3-cup containers stack perfectly like bricks. For produce and snacks, I use Zip Top silicone bags. A set of three costs $19.99. They stand upright on their own, which makes pouring soup into them incredibly easy. The thick silicone feels substantial and seals tightly. I also keep a 3-pack of Bee’s Wrap ($18.00) in a shallow drawer. It’s a piece of organic cotton coated in beeswax, jojoba oil, and tree resin. It smells faintly of honey. You use the warmth of your hands to mold it over half an avocado or a block of cheddar cheese. It replaces rolls of plastic wrap that inevitably tangle and tear.

Kitchen Gadgets Set 5 Pieces
Honestly, Kitchen Gadgets Set 5 Pieces surprised me — sturdier than it looks in the photos, and over 49 buyers gave it 4.5 stars.
10. Master the Kitchen Triangle for Workflow Efficiency

The kitchen triangle is the path between your sink, stovetop, and refrigerator. If you ignore this during a remodel, you’ll hate cooking. I lived in a rental house where the fridge was located across a hallway, completely outside the main prep zone. I dripped raw chicken juice on the hardwood floors at least twice a week trying to carry items to the sink. You want these three stations within two to three steps of each other. Aim for exactly 39 inches of circulation space between opposing countertops. Anything less than 36 inches means two people can’t pass each other, and you can’t open the dishwasher and the oven at the same time. If you have the space, 48 inches is ideal. When I updated my current layout, I mapped out the triangle with blue painter’s tape on the subfloor. I physically walked through the motions of making pasta. I realized the trash pull-out was on the wrong side of the sink. I moved it before the cabinets were permanently installed.
11. Conceal Small Appliances and Utensils

Visual clutter causes mental fatigue. Staring at a toaster, a blender, a stand mixer, and a coffee pot on your counter makes the room feel cramped before you even start cooking. I built an appliance garage into my pantry corner. It’s basically a cabinet resting directly on the counter with a retractable tambour door. Inside, I keep my Breville espresso machine ($699.95) and my toaster. They stay plugged into an outlet hidden inside the cabinet. When I’m done making coffee, I slide the door down. The mess disappears instantly. The only items allowed to live permanently on my exposed countertops are a salt cellar ($12.00 from Crate & Barrel) and a bottle of olive oil. Everything else goes behind a closed door. I used to leave my KitchenAid mixer out because it was heavy and pretty. But it gathered a sticky layer of aerosolized cooking grease and dust. Wiping down the intricate curves of a stand mixer every week is a waste of time. Hide it.
12. Integrate Lighting Thoughtfully

A single harsh overhead light casts terrible shadows on your cutting board. It makes the room feel like a cheap diner. You need three distinct layers of lighting. First, ambient lighting for the whole room. Second, task lighting for the counters. Third, accent lighting for depth. I installed the Philips Hue Lightstrip Plus ($89.99 for 80 inches) underneath my upper cabinets. The LED strip adheres directly to the wood with a sticky backing. It took me ten minutes to install. It provides bright, even light directly onto my prep surface without blinding me. I can change the color temperature from a cool daylight blue for chopping vegetables to a warm amber for the evening. The adhesive on the back of the strips is notoriously weak, though. Mine peeled off after three months. I had to secure them with small plastic mounting clips ($5.99 from Home Depot) and tiny screws. Don’t rely on the tape alone. Good lighting makes a small, simple space feel expansive and intentional.

Kitchen Gadgets Set 5 Pieces
A dependable everyday pick — Kitchen Gadgets Set 5 Pieces pulls in 42 ratings at 4.5 stars. Not flashy, just solid.
13. Personalize a Simple Minimalist Kitchen with Intentional Decor

Minimalism doesn’t mean your house should look like an empty waiting room. I made this mistake early on. I stripped everything off the walls and counters, and the room felt dead. It echoed when I chopped carrots. You need intentional personalization to bring warmth back in. Instead of cluttering the space with ten small knickknacks, choose one or two substantial items. I keep a large, handmade ceramic bowl ($65.00 from a local pottery market) in the center of my island. It holds fresh lemons. The bright yellow against the dark bowl adds exactly enough color. I also hung one large piece of abstract art with a thin oak frame on the only blank wall. Rich, natural materials create a depth of character that cheap plastic decor can’t match. I keep one Pothos plant in a terracotta pot ($14.00 from Trader Joe’s) on the windowsill above the sink. The green leaves soften the hard, straight lines of the cabinetry. Keep it simple, but keep it human.
14. Embrace Matte Finishes for Durability and Aesthetics

Glossy surfaces show every single fingerprint, water spot, and dog nose smudge. I used to have high-gloss white cabinets. I spent ten minutes every night buffing them with glass cleaner just to keep them looking decent. It drove me crazy. When I updated the space, I switched entirely to matte finishes. I chose a matte quartz countertop called Silestone Desert Silver (roughly $85.00 per square foot). It feels smooth but has zero shine. It absorbs light instead of bouncing it into your eyes. Matte finishes hide smudges remarkably well. They also make warm color palettes feel richer and more grounded. The only downside to matte quartz is that it can show metal marks if you scrape a heavy cast iron pan across it. You have to use a mild abrasive like Bar Keepers Friend ($2.99 at Kroger) to gently buff the gray scuffs out. But overall, a matte surface requires far less daily maintenance and fits perfectly into a quiet, understated aesthetic.
15. Utilize Door Storage and Corner Solutions

The back of a cabinet door is prime real estate that most people completely ignore. I use it for items that are flat or awkward to store in deep drawers. I installed a simple wire wrap station ($12.99 from Walmart) on the inside of my pantry door. It holds my aluminum foil, parchment paper, and plastic storage bags perfectly. Before this, those long boxes jammed my shallow drawers constantly. For awkward lower corner cabinets, a blind corner is where Tupperware goes to die. I installed a Rev-A-Shelf half-moon lazy Susan ($119.99). It pivots out smoothly when I open the door, bringing heavy pots right to the front. The installation was frustrating. I had to contort myself inside the cabinet with a drill for an hour, and the instructions were useless. But the result is that I never have to crawl on my hands and knees with a flashlight to find a misplaced lid. Utilizing these hidden zones keeps the visible areas completely clear.

Mfacoy Spoon Rest for Stove Top
Mfacoy Spoon Rest for Stove Top punches above its price — 796 buyers rated it 4.5 stars. I would buy it again.
16. Maintain the System with Daily Habits

No amount of expensive cabinetry or clever organizers will maintain your kitchen if you lack daily discipline. A pared-down space shows clutter instantly. One piece of junk mail on an empty counter looks like a massive mess. I rely on a strict 10-minute reset rule every single night. After dinner, the dishwasher gets loaded and started. I wipe down the matte quartz counters with a damp microfiber cloth ($9.99 for a 12-pack at Costco) and a spray of Mrs. Meyer’s Lemon Verbena surface cleaner ($4.50). It smells incredibly fresh. I dry the sink basin with a towel. Leaving water spots in a stainless steel sink makes the whole room feel slightly dirty. I take out the trash, even if it’s only half full, to prevent lingering smells. Waking up to a dark, perfectly clean kitchen the next morning sets the tone for my entire day. The physical act of resetting the room is just as important as the initial decluttering phase. Trust me on this.
You don’t need a massive renovation budget to create a calm, highly functional space. Start by removing the excess garbage hiding in your drawers right now. I’ve lived with these systems for three years, and the peace of mind is worth the initial effort of purging. If you found these tips helpful, pin this article to your home inspiration board and start tackling your own cabinets this weekend.
Frequently Asked Questions
What defines a simple minimalist kitchen?
A simple minimalist kitchen focuses on high functionality and low visual clutter. It prioritizes hidden storage, multi-functional appliances, flat-panel cabinetry, and clear countertops, ensuring every item serves a specific purpose.
How do I hide appliances in a simple minimalist kitchen?
Use an appliance garage with a tambour door to hide small gadgets like toasters and coffee makers. For large items like refrigerators and dishwashers, use panel-ready models that blend directly into your cabinetry.
Are white cabinets required for a minimalist kitchen?
No. Warm minimalism is highly popular, utilizing muted earthy tones like olive green, clay, and warm beige. These colors add depth and hide scuffs much better than stark white while maintaining a clean aesthetic.
How do I keep my minimalist kitchen counters clear?
Utilize vertical space with magnetic knife strips and stackable shelf organizers inside cabinets. Adopt a strict daily reset routine, wiping down counters and putting away all mail, dishes, and small appliances every night.
