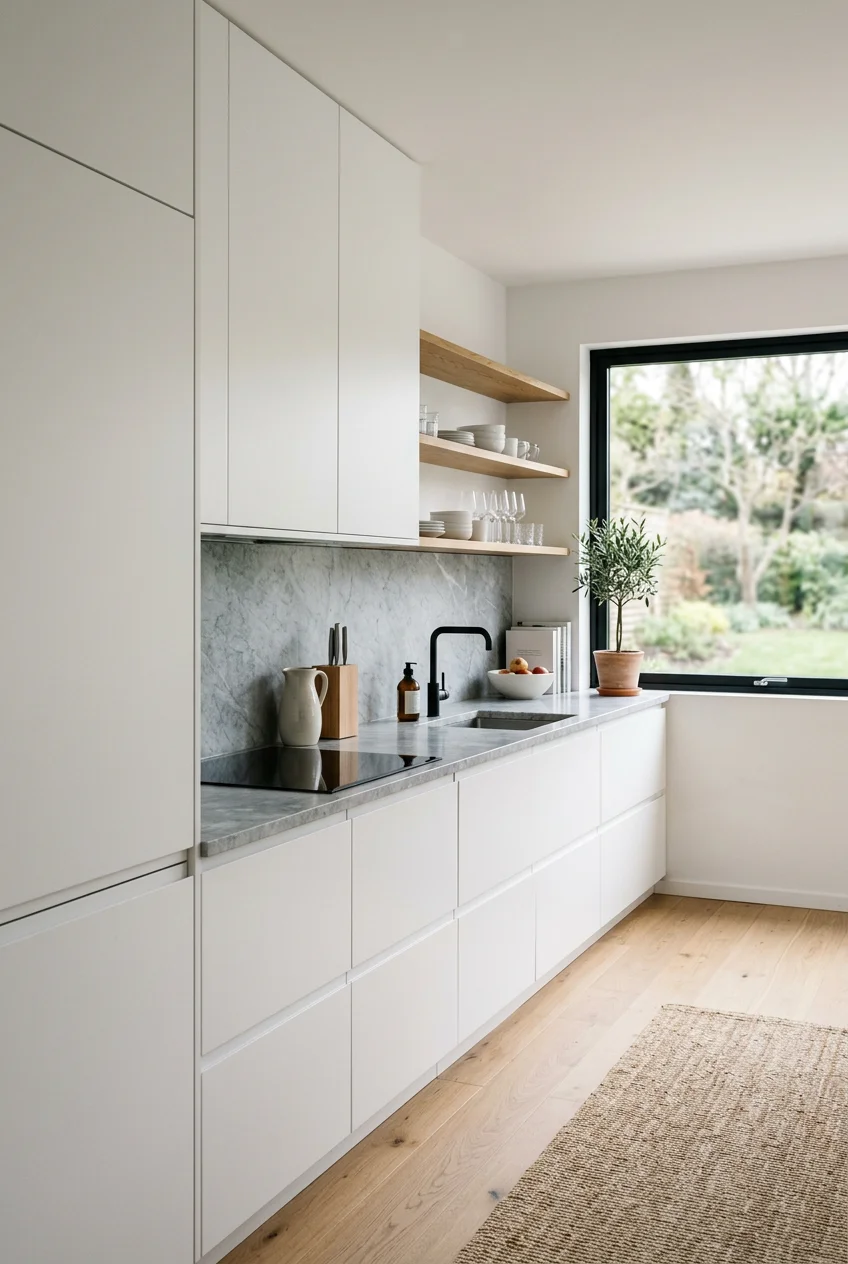
What’s Inside
- Embrace Muted Tones for a Scandinavian Minimalist Kitchen
- Install Seamless Handleless Cabinetry
- Maximize Concealed Drawer Storage
- Integrate Your Major Appliances
- Layer Your Lighting Strategically
- Choose Timbers for Your Scandinavian Minimalist Kitchen
- Install a Minimalist Matte Faucet
- Introduce Warmth with Subtle Textiles
- Group Tall Storage to Open Sightlines
- Embrace the Scandi Elegance Trend
- Use Open Shelving Sparingly
- Prioritize Deep Toe-Kick Drawers
- Add Life with Minimalist Greenery
- Hide Small Appliances in a Garage
- Select Matte Finishes for Cabinetry
- Maintain the Void on Your Countertops
Three years ago, I stood in my cramped, dark kitchen trying to shove a Costco-sized box of oats into a cabinet that wouldn’t close. A rogue plastic measuring cup fell out and hit me square on the nose. That bruised nose was the catalyst for designing my first Scandinavian minimalist kitchen. I realized I didn’t need more space. I needed a system that actually functioned without visual chaos. Creating a Scandinavian minimalist kitchen isn’t about throwing everything away and living in a sterile white box. It’s about intentional choices, tactile materials, and leaving room to breathe. I’ve spent the last few years refining this approach, making plenty of expensive mistakes along the way. Let’s walk through nineteen concrete ways to build a functional, calm space.
1. Embrace Muted Tones for a Scandinavian Minimalist Kitchen

Most people assume minimalism means painting everything bright white. I tried this wrong for months before figuring it out. My first kitchen remodel looked like a dental clinic. A true Scandinavian minimalist kitchen relies on soft greys, warm beiges, or muted olive greens to avoid a flat, cold feel. I recently painted my lower cabinets in Farrow & Ball’s Light Gray (which is actually a complex greenish-beige). At $130 per gallon, it’s a splurge, but the pigment depth is incredible. I used an eggshell finish because matte paint in a kitchen absorbs grease and is impossible to scrub clean. I paired it with a $499 solid oak butcher block from Home Depot. Expert Deborah Bass from Bass Interior notes that neutrals need to be paired with other materials like timber and marble to sing. If you use white, pick an off-white with a warm undertone. Pure white reflects too much blue light, especially in north-facing rooms. The subtle contrast between a soft putty wall and a natural wood counter creates warmth without clutter. Trust me on this.
2. Install Seamless Handleless Cabinetry

Visible hardware creates visual noise. When you look across a standard kitchen, fifty metal knobs instantly break up the sightlines. Opting for flat-front or slim-shaker profile cabinets with push-to-open systems eliminates this clutter. I installed IKEA’s FRÖJERED bamboo fronts in my current space. At $89 for a standard 18×30 inch door, they provide a streamlined appearance without the custom cabinetry price tag. The bamboo grain adds texture, but the completely flat surface keeps the aesthetic quiet. One negative I’ll admit here. Push-to-open mechanisms can be finicky. I bought cheap generic latches on Amazon first, and they broke within a week. You have to buy the heavy-duty Blum push latches ($6.50 each). They require a firm press, but they won’t accidentally pop open when you lean against the counter to chop vegetables. Make sure to adjust the soft-close hinges so the door shuts silently. A slamming cabinet door ruins the peaceful vibe instantly.
3. Maximize Concealed Drawer Storage

Clutter is the enemy of minimalism. If your countertops are covered in air fryers and spice racks, the aesthetic falls apart instantly. The solution isn’t having less stuff. It’s having smarter internal storage. I prioritize deep drawers over standard cabinets with doors. Bending down to dig through a dark lower cabinet is inefficient. Instead, I use 30-inch wide, 15-inch deep drawers. If you have the budget, upgrade to full-extension drawer glides. They allow you to reach the very back of the 15-inch depth without blindly digging around. Inside, I use IKEA’s UPPDATERA plate holders. They cost $9.99 for the 6-to-9 inch adjustable size. They lock plates in place so they don’t slide when you open the drawer. I also use their 15×19.5 inch bamboo flatware trays ($24.99). Last Tuesday at Kroger, I bought six different bulk spices. Because my drawers are perfectly divided, I immediately transferred them into identical 4 oz square glass jars ($1.50 each from Uline) and slotted them into a dedicated spice drawer. Everything has an exact home. It’s a total win.

Wagensteiger Stainless Steel Curved Garlic Presser or
Wagensteiger Stainless Steel Curved Garlic Presser or Cheese Grater has been one of the most consistently praised picks in this category. 13 reviewers averaged 4.5/5.
4. Integrate Your Major Appliances

A giant stainless steel refrigerator is a visual black hole in a light, airy kitchen. To maintain a clean, uninterrupted aesthetic, you need to hide the appliances behind handleless cabinet fronts. Built-in refrigerators from brands like Sub-Zero or Bosch integrate directly into your cabinetry. I couldn’t afford a $9,000 Sub-Zero, so I opted for a Bosch 800 Series panel-ready fridge for $2,999. Make sure you specify a counter-depth refrigerator. A standard-depth fridge will stick out six inches past your cabinets and ruin the flush, built-in appearance. I attached matching bamboo panels to the front. From a distance, it just looks like a tall pantry wall. It reduces visual breaks and makes my small 120-square-foot layout feel significantly larger. I also swapped my bulky gas range for a sleek 30-inch Café Appliances induction cooktop ($2,499). The perfectly flat black glass blends right into my dark soapstone counters. There aren’t any grates to clean and no knobs sticking out. It’s completely flush.
5. Layer Your Lighting Strategically

Relying solely on six harsh recessed ceiling cans is a common mistake. It makes the room feel like an interrogation cell. Scandinavian design requires layered lighting. You need ambient light for the whole room, task lighting for chopping, and accent lighting for mood. I use simple, sculptural pendant lights over the island. For my 7-foot island, I hung three 14-inch diameter matte white pendants spaced 24 inches apart. I hung them exactly 32 inches above the counter. I initially bought cheap glass pendants from Target, but they showed every speck of dust. I replaced them with a Muuto Ambit pendant ($225 each). The spun aluminum shade directs all the light downward onto the work surface, leaving the ceiling in soft shadow. Always put your pendants on a dimmer switch. You want bright light for rolling out dough, but a soft, warm glow when you’re just walking in to grab a glass of water at night. I also installed under-cabinet LED light strips ($45 from Home Depot) for task lighting. They provide a warm 2700K glow directly onto the cutting board. You might also like: 19 Travel Capsule Wardrobe Summer That Actually Work
6. Choose Timbers for Your Scandinavian Minimalist Kitchen

Pale ash and bleached pine were popular five years ago, but the trend is shifting toward richer, mid-tone hues. Golden oaks, smoked walnut, and toasted ash bring a grounded warmth to a Scandinavian minimalist kitchen. I recently ripped out my cold grey laminate floors and installed 7-inch wide engineered European oak planks from Costco ($45 per box, each box covers 17 square feet). The golden undertones completely changed the temperature of the room. When selecting wood, matte finishes are essential. Glossy polyurethane looks cheap and shows every scuff. My flooring has a wire-brushed, matte oil finish. It hides dust and feels slightly textured under bare feet. If you’re mixing woods, stick to a maximum of two tones. I paired the golden oak floors with a slightly darker walnut floating shelf ($110 from West Elm). Any more than two wood species, and the space starts feeling messy. If you’re worried about water damage near the sink, put down a washable wool runner. It protects the oak while adding another layer of texture to the room. Learned that the hard way.

Public Goods Kitchen Tool Set | 6 Piece Kitchen Utensil Set
If you want something that just works, Public Goods Kitchen Tool Set | 6 Piece Kitchen Utensil Set | Includes is a safe bet (35 reviews, 4.5 stars).
7. Install a Minimalist Matte Faucet

Your kitchen faucet is a sculptural element you touch twenty times a day. It needs to be functional and visually quiet. I recommend sleek, simple, single-handle faucets in brushed nickel or matte black. Low-arc faucets are generally preferred for their understated look, but I need clearance for large pots. I compromised with a Moen Align spring pulldown faucet in matte black ($349). The single lever controls both temperature and flow. Pair your matte faucet with an under-mount stainless steel sink. Drop-in sinks have a visible lip that catches crumbs and disrupts the flat surface of the counter. A surprising tip I learned recently is to consider a touchless faucet. I initially thought they were a gimmick. Then I spent an afternoon making meatballs and had to wash my hands constantly. A touchless sensor means you aren’t leaving greasy fingerprints all over the matte finish. Delta’s Trinsic Touch2O ($415) has a perfectly cylindrical, unadorned profile that fits the aesthetic perfectly while hiding the technology inside. You might also like: 15 Clever Minimalist Living Home Tips You Haven’t Thought Of
8. Introduce Warmth with Subtle Textiles

A minimalist kitchen can feel clinical without soft textures. You need to introduce warmth through subtle textiles, but keep them intentional. I avoid loud patterns or novelty prints. Stick to neutral or pastel tones. I buy the Threshold linen-blend dish towels from Target. They cost $12 for a two-pack. I specifically choose the muted sage green or oatmeal colors. They absorb water better than cheap cotton and look beautiful draped over the edge of the sink. I installed small brass hooks under the sink specifically for hanging wet towels out of sight. Leaving them crumpled on the counter looks messy. I also keep a 2×3 foot textured wool runner ($89 from Rugs USA) in front of the sink. It adds a soft layer underfoot while washing dishes. Interior designer Emily notes that these elements contrast with the minimalist design while maintaining a cohesive look. Just remember to wash the runner frequently. I once spilled a half cup of espresso on a cream-colored wool rug, and it took three rounds of spot cleaner to fix. You might also like: 15 Cozy 2026 Capsule Wardrobe Ideas That Are Totally Worth It
9. Group Tall Storage to Open Sightlines

A common layout mistake is spreading upper cabinets across every single wall. This makes the room feel top-heavy and crowded. To optimize circulation and keep sightlines open, group all your tall storage together on one wall. I designated the back wall of my kitchen as the storage zone. I installed a 71-inch tall IKEA SEKTION pantry cabinet ($315 for the frame and shelves). It holds my broom, vacuum, dry goods, and small appliances. If your tall pantry is dark inside, stick motion-sensor LED puck lights ($15 for three) to the ceiling of the cabinet. They turn on automatically when you open the door. Because all the bulk is concentrated in one area, the other three walls are completely free of upper cabinets. This allows the natural light from the window to travel across the entire room. If you have a small space, use slim 15-inch depth cabinetry for your lowers instead of the standard 24-inch depth. You lose a little storage, but you gain crucial floor space for moving around comfortably.

Kitchen Gadgets Set 5 Pieces
Kitchen Gadgets Set 5 Pieces punches above its price — 42 buyers rated it 4.5 stars. I would buy it again.
10. Embrace the Scandi Elegance Trend

The 2026 design direction is shifting toward a trend called Scandi Elegance. It combines the clean lines of Nordic design with a touch of French sophistication. It’s about subtle material contrasts rather than stark minimalism. To achieve this, I paired a soft putty-colored cabinet (Sherwin Williams Accessible Beige, $75 per gallon) with a heavily veined Carrara marble backsplash. The stone provides organic movement, while the cabinets stay quiet. If you use a marble backsplash, insist on the thinnest grout line possible, usually 1/16 of an inch. Thick grout lines look busy and distract from the veining in the stone. I also introduced shiny metallic details. Instead of flat black hardware, I used unlacquered brass edge pulls ($14 each from Rejuvenation). Over time, the oils from your hands tarnish the brass, giving it a beautiful, lived-in patina. It’s a small nod to classic European bistros, filtered through a minimalist lens. Just be prepared to polish them once a year if you don’t like the aged look. I let mine tarnish naturally.
11. Use Open Shelving Sparingly

Open shelving is highly debated in minimalist circles. If you fill a shelf with mismatched plastic cups and protein powder tubs, it looks terrible. But if you use it intentionally, it adds character. I removed one 30-inch upper cabinet and replaced it with a single floating white oak shelf ($65 from Etsy). Make sure your floating shelf has invisible internal steel brackets. Bulky exterior corbels lean too traditional and clutter the wall space. I treat this shelf as a display for functional items I use daily. It holds six identical stackable Duralex Picardie water glasses ($24 for a set of six) and a handmade ceramic pour-over coffee dripper. That’s it. Leaving negative space around the objects is crucial. If a shelf is more than sixty percent full, it reads as cluttered. I dust it every Sunday with a microfiber cloth. If you aren’t willing to keep the items perfectly organized and dust-free, skip the open shelving entirely and stick to closed cabinets.
12. Prioritize Deep Toe-Kick Drawers

When you’re trying to maximize storage in a minimalist layout, you have to look at wasted space. The 4.5-inch gap between the bottom of your cabinets and the floor is usually covered by a useless piece of trim. I converted this space into toe-kick drawers. I used the IKEA MAXIMERA low drawers ($35 each) and modified the baseboards to attach to the drawer fronts. These shallow, floor-level drawers are absolutely brilliant for storing flat, awkward items. I keep my 18×13 inch aluminum half-sheet baking pans, a pizza stone, and folded reusable grocery bags down there. You open them by tapping the front with your foot. It keeps the heavy, clunky items out of my main prep drawers. Because toe-kick drawers sit so close to the floor, they do collect dust faster than upper cabinets. I run the vacuum attachment along the edges once a month. I did mess up the installation on the first one by not leaving enough clearance for the rug, so the drawer scraped the wool. Measure your rug thickness before installing.

Joseph Joseph Nest Utensils Compact Stacking Kitchen Tool
Joseph Joseph Nest Utensils Compact Stacking Kitchen Tool Set with Mag has been one of the most consistently praised picks in this category. 37 reviewers averaged 4.5/5.
13. Add Life with Minimalist Greenery

A completely bare kitchen feels like a showroom, not a home. Adding a touch of greenery brings life to the hard surfaces. I don’t mean a jungle of hanging pothos vines. I mean one or two sculptural plants. Last month at Sprouts, I found a small, 12-inch tall olive tree topiary for $14.99. I repotted it into a simple, unglazed terracotta cylinder ($8 from Target). Avoid plastic plant pots at all costs. The shiny plastic clashes with the natural materials in the rest of the room. I keep it on the counter right next to the window. The silvery-green leaves perfectly complement the muted tones of the cabinetry. Another great option is keeping fresh herbs. I buy a $3 basil plant from Trader Joe’s every few weeks and keep it in a white ceramic sleeve. It smells incredible when you brush past it, and you can toss the leaves directly into your pasta. When it inevitably dies after a month, I just compost it and buy a new one.
14. Hide Small Appliances in a Garage

The toaster, the blender, and the coffee maker are visual noise. Even if you buy expensive, beautiful appliances, having three of them lined up on the counter ruins the minimalist aesthetic. You need an appliance garage. This is a dedicated cabinet that sits directly on the countertop, usually with a lift-up or pocket door. I built a 24-inch wide appliance garage in the corner of my kitchen. Inside, I installed a double electrical outlet. When building the garage, ask your electrician to place the outlets horizontally near the bottom. This prevents ugly black cords from dangling down the back wall. My Breville Bambino espresso machine ($349) and my Vitamix sit inside, permanently plugged in. When I want coffee, I lift the door, make my drink, and close the door. The mess is hidden instantly. I tried keeping my toaster in a regular lower cabinet for a while, but pulling it out and plugging it in every morning was incredibly annoying. The appliance garage solves the functionality problem while preserving the clean look.
15. Select Matte Finishes for Cabinetry

High-gloss cabinets belong in a 2005 modern loft, not a cozy Scandinavian kitchen. Glossy surfaces reflect light harshly and show every single fingerprint, smudge, and water drop. Matte finishes are trending because they absorb light, creating a softer, more velvety appearance. They also reduce glare from under-cabinet lighting. I chose a super-matte finish for my drawer fronts. Specifically, I used the REFORM Basis doors in painted mushroom ($120 per door). They have a specialized anti-fingerprint coating. It actually works. I can open the drawers with wet, slightly greasy hands while cooking, and it won’t leave a permanent mark. If you use matte cabinets, pair them with brushed or matte hardware. Polished chrome knobs on a matte door create a jarring visual contrast. You just wipe them down with a damp microfiber cloth and a drop of Dawn dish soap. Avoid harsh chemical cleaners on matte finishes, as they can break down the anti-fingerprint coating over time and leave weird shiny patches.

Kitchen Utensils Set – 34 PCS Non-Stick Silicone Cooking
Kitchen Utensils Set – 34 PCS Non-Stick Silicone Cooking Utensils Set has been one of the most consistently praised picks in this category. 202 reviewers averaged 4.5/5.
19. Maintain the Void on Your Countertops

The final and most difficult step in achieving a minimalist kitchen is behavioral. You have to protect the empty space. The void on your countertops is a design element itself. It’s not empty space waiting to be filled with mail, keys, and dirty coffee mugs. I enforce a strict clear-the-decks rule every evening. Before I turn off the kitchen lights, the counters must be completely bare, except for the olive tree and the soap dispenser. If you use a stand mixer once a month, it doesn’t earn the right to live on the counter. Put it in the pantry. Last Friday, I caught myself piling grocery receipts and a half-empty box of crackers next to the sink. I immediately filed the receipts and put the crackers in the pantry. If you don’t aggressively protect the empty space, the clutter will slowly creep back in. I keep a small woven basket ($15 from Target) in the mudroom specifically for random items that try to migrate into the kitchen. No exaggeration.
Creating a functional, calm space doesn’t happen overnight. It took me three years of tweaking, repainting, and returning products to finally get my kitchen to feel right. You don’t have to rip out your cabinets today. Start by clearing your countertops, swapping your harsh lightbulbs for warm 2700K LEDs, and hiding your trash can. If you found these nineteen tips helpful, pin this article to your kitchen renovation board so you have the specific measurements and brand names ready when you start your project.
Frequently Asked Questions
What colors work best in a scandinavian minimalist kitchen?
Avoid stark white, which can feel clinical. Instead, use soft greys, warm beiges, and muted olive greens. Pairing these subtle tones with natural wood and stone creates a warm, inviting environment.
How do I hide appliances in a scandinavian minimalist kitchen?
Use an appliance garage for small items like blenders and toasters. For major appliances, install panel-ready refrigerators and dishwashers that blend perfectly with your handleless cabinetry.
What countertops fit a scandinavian minimalist kitchen?
Natural stone surfaces with tactile, matte finishes work best. Soapstone, honed marble, and limestone provide organic warmth and texture that perfectly complements minimalist cabinetry.
Can I use open shelving in a scandinavian minimalist kitchen?
Yes, but use it sparingly. Install a single floating wood shelf and display only a few functional, matching items like water glasses or ceramic mugs. Negative space is essential.
